Joan's web log
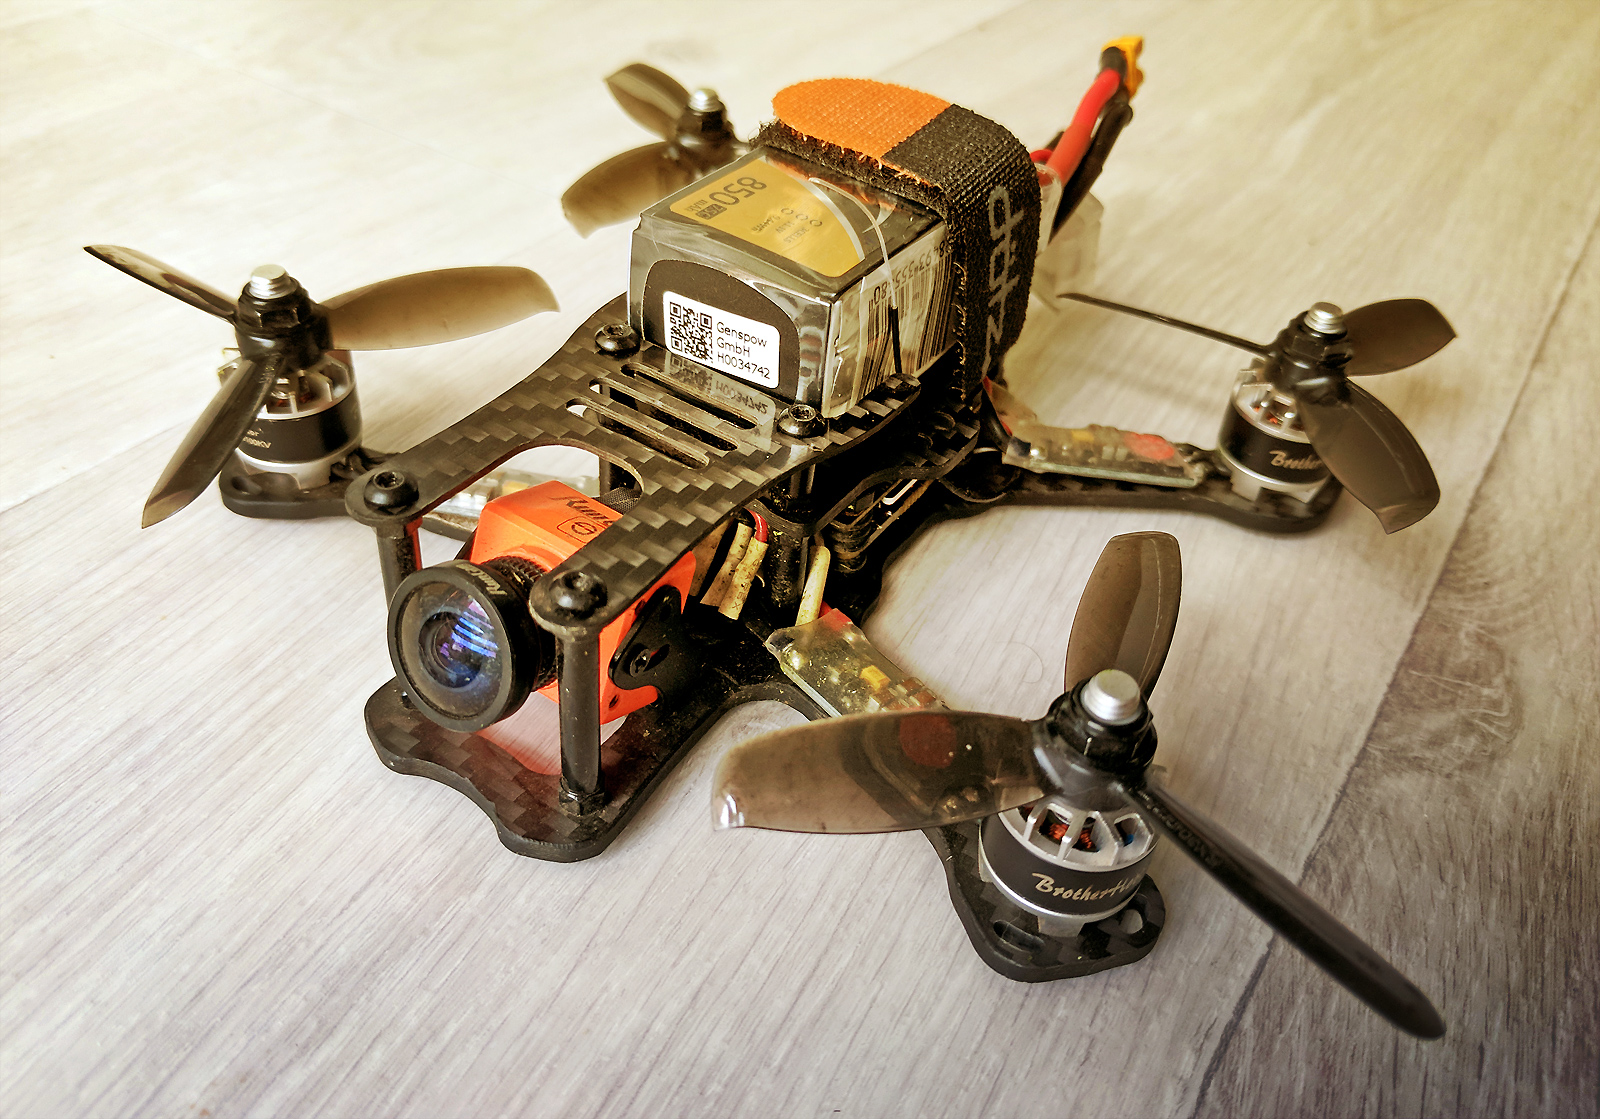
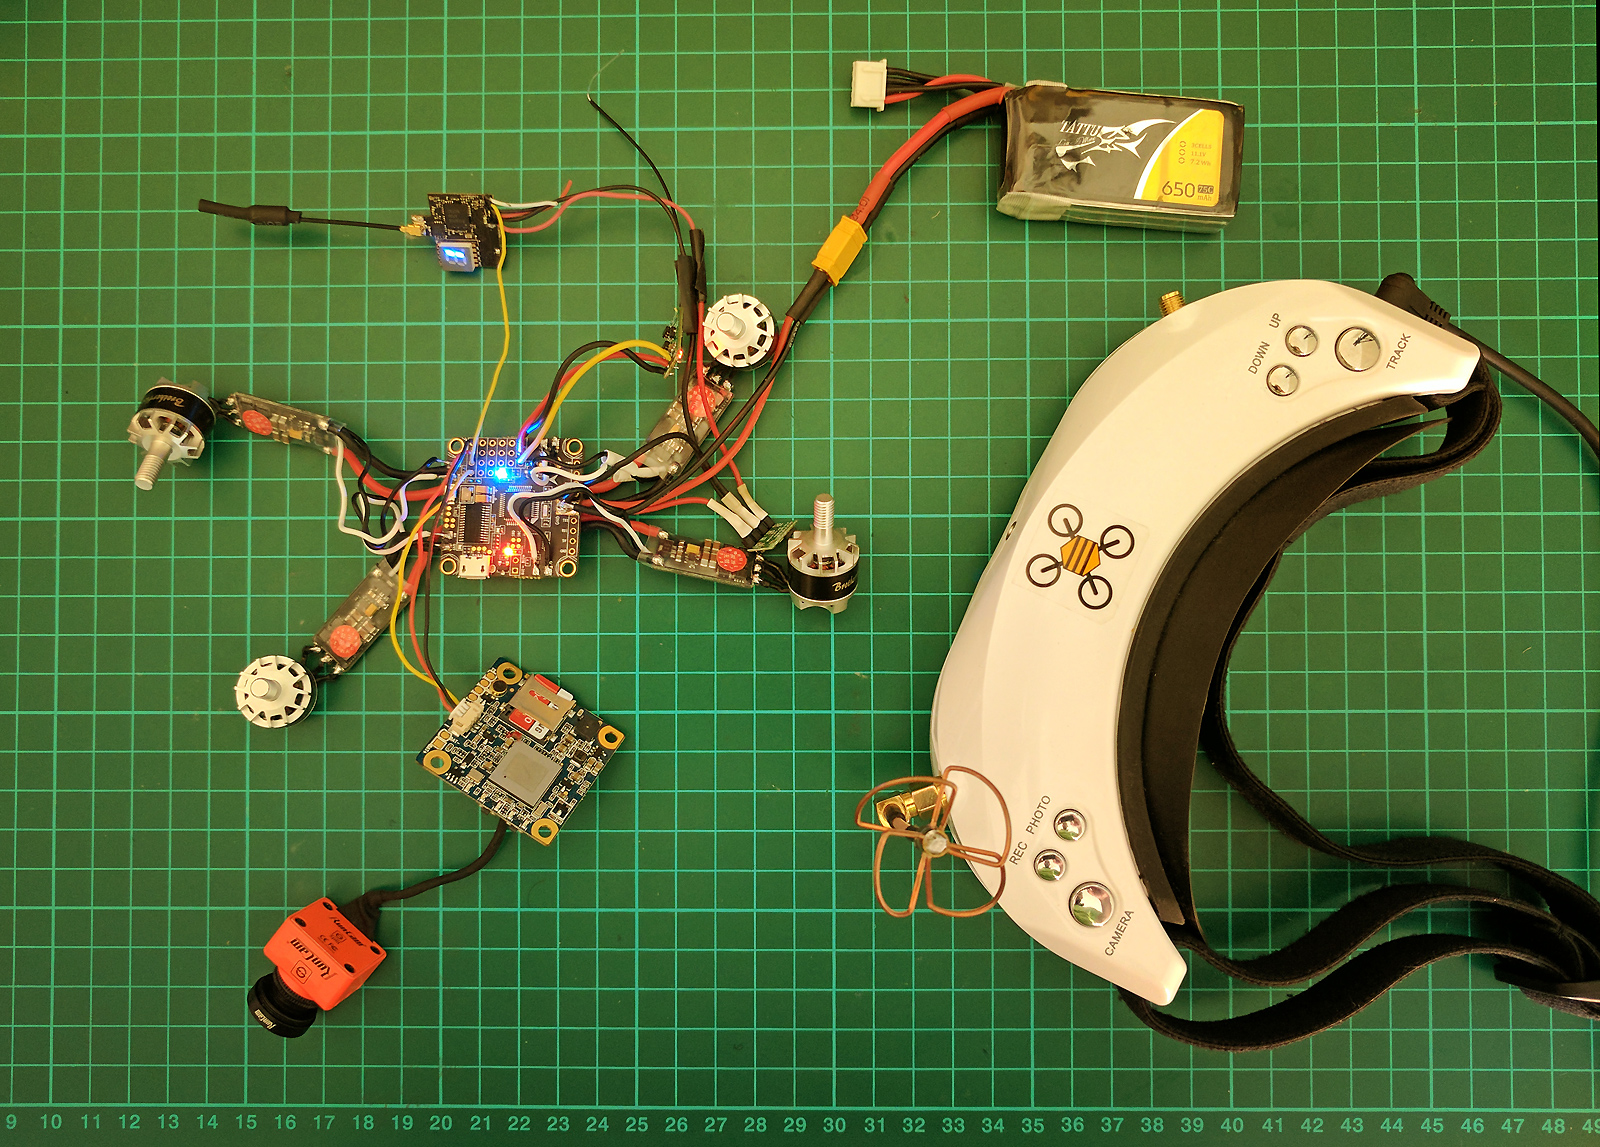
This is my build report on a 3-inch-propellers micro-quadcopter using the Vendetti 145mm frame and sporting a Runcam Split HD/FPV camera. The goal is to have a nimble robotic body and lightweight camera platform in the air, at a cost that doesn’t make me anxious to fly in adverse conditions.
Here is a line from the end of November with the updated version of the build described below.
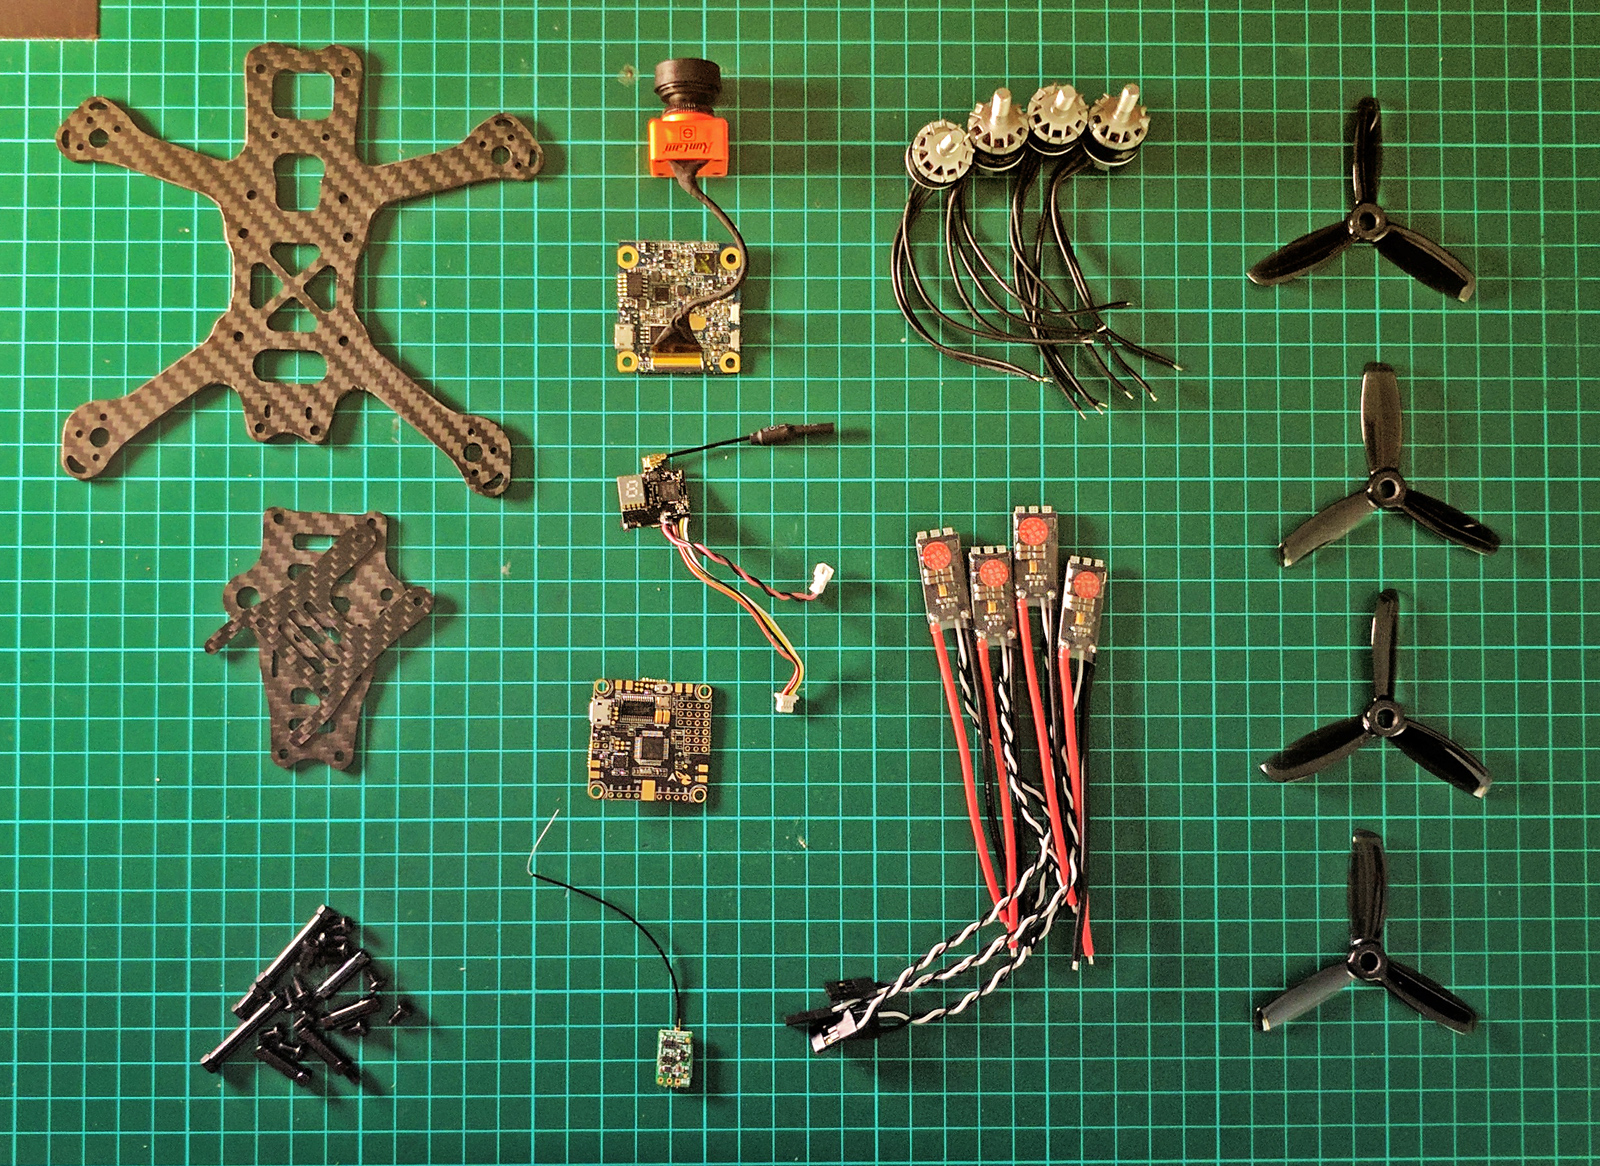
Parts
- Frame: Vendetti 3" for Runcam Split.
- Flight controller: Betaflight F3.
- ESCs: Zigogne ESC 20A BLHELI-S.
- Motors: BrotherHobby Tornado 1306, 3100kv. Update: XNova 1407, 3500Kv.
- Propellers: RotorX RX3044T and DALPROP T3045. Update: HQProps DP 3x3x3 and HQProps DP 3x3x4.
- Hardware: Standoffs Aluminum M3x29mm, M3x17mm, M3x10mm. Grub screw M3x8mm, M3 o-rings, various nylon hardware for the stack.
- Batteries: Tattu 3S 850mAh. XT30. Update: Tattu 4S 850mAh. XT30.
- RC receiver: FrSky XM (SBUS).
- Secondary voltage regulator: Pololu 5V 600mA.
- Camera: Runcam Split.
- SD card: Samsung MicroSD Evo Plus 64GB.
- Video transmitter: Eachine ATX03.
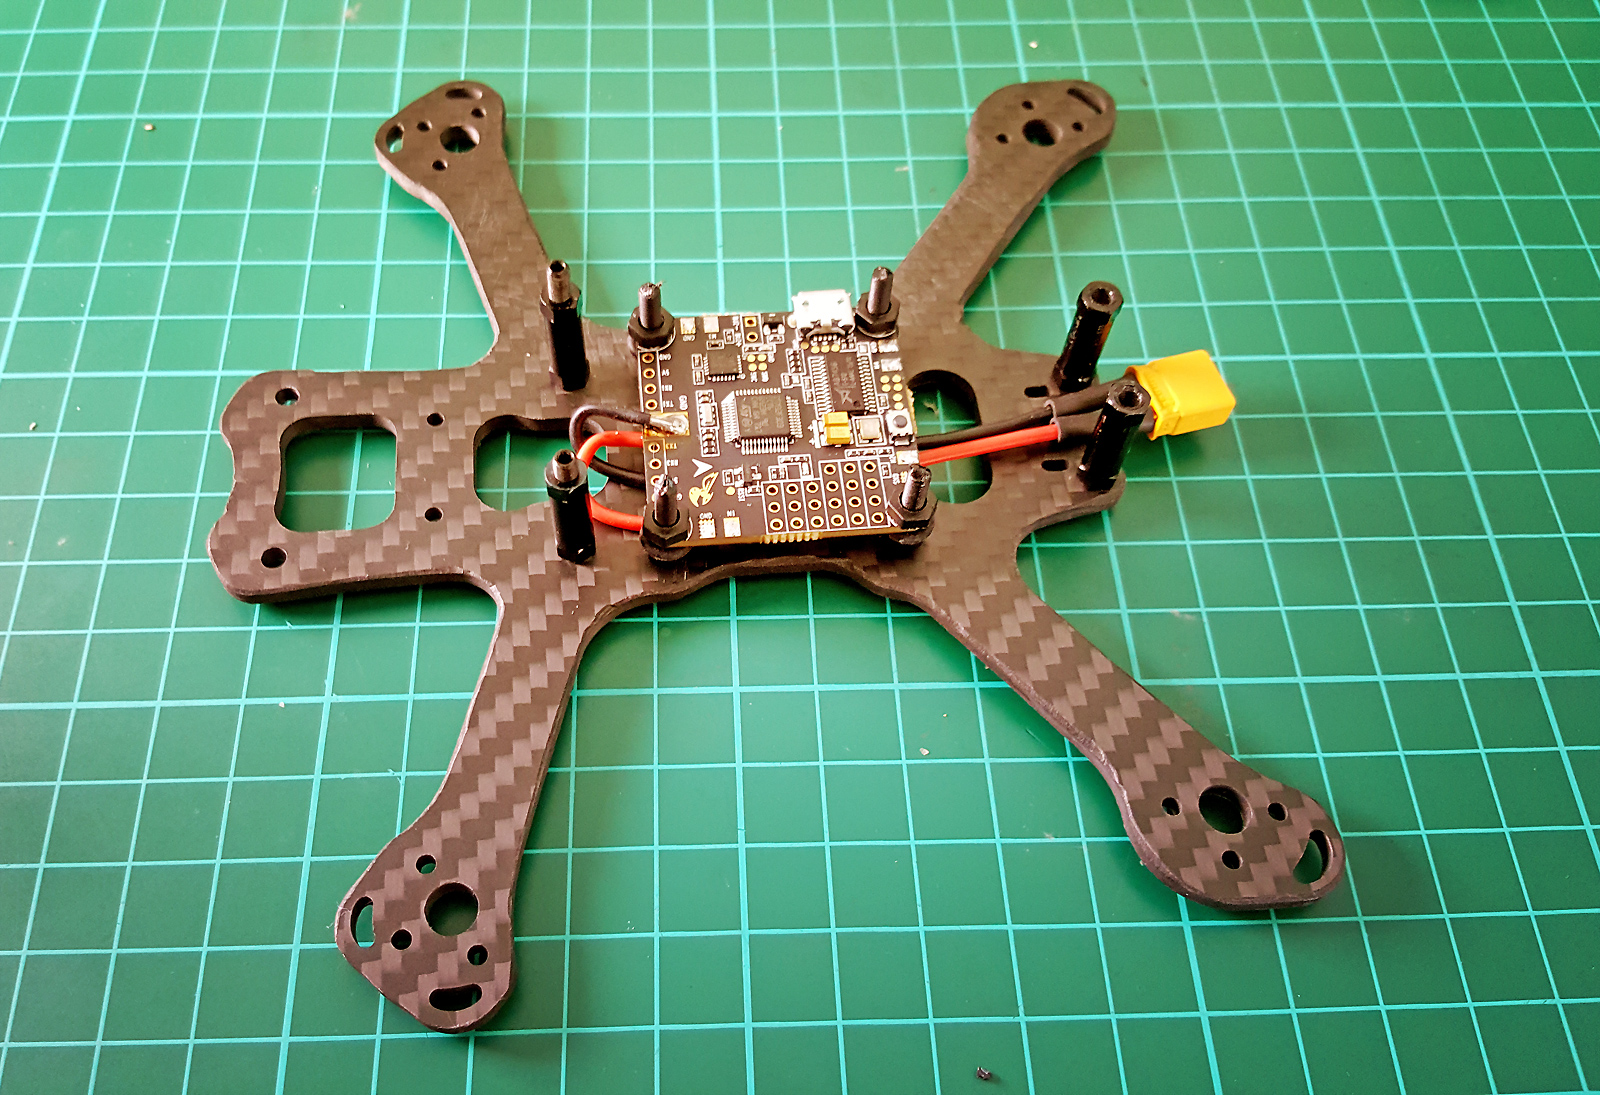
I selected the BFF3 flight controller because it has 30.5x30.5mm mounting holes, has a PDB integrated, and a 5V/3A BEC with a reverse current protection diode.
The BEC is important for the Runcam split which only supports 5V input and draws 650mA. It is also known to push current back through the BEC when connected, so the diode is welcomed. However I also read about the BFF3 that the actual max current flowing to the camera wouldn’t really be 3A but more like 1A and that the Split was sensitive to not having enough current, so I decided to run the VTX on a separate voltage regulator wired directly to the battery. So far I haven’t had any issues with the powering of the electronics.
Build process
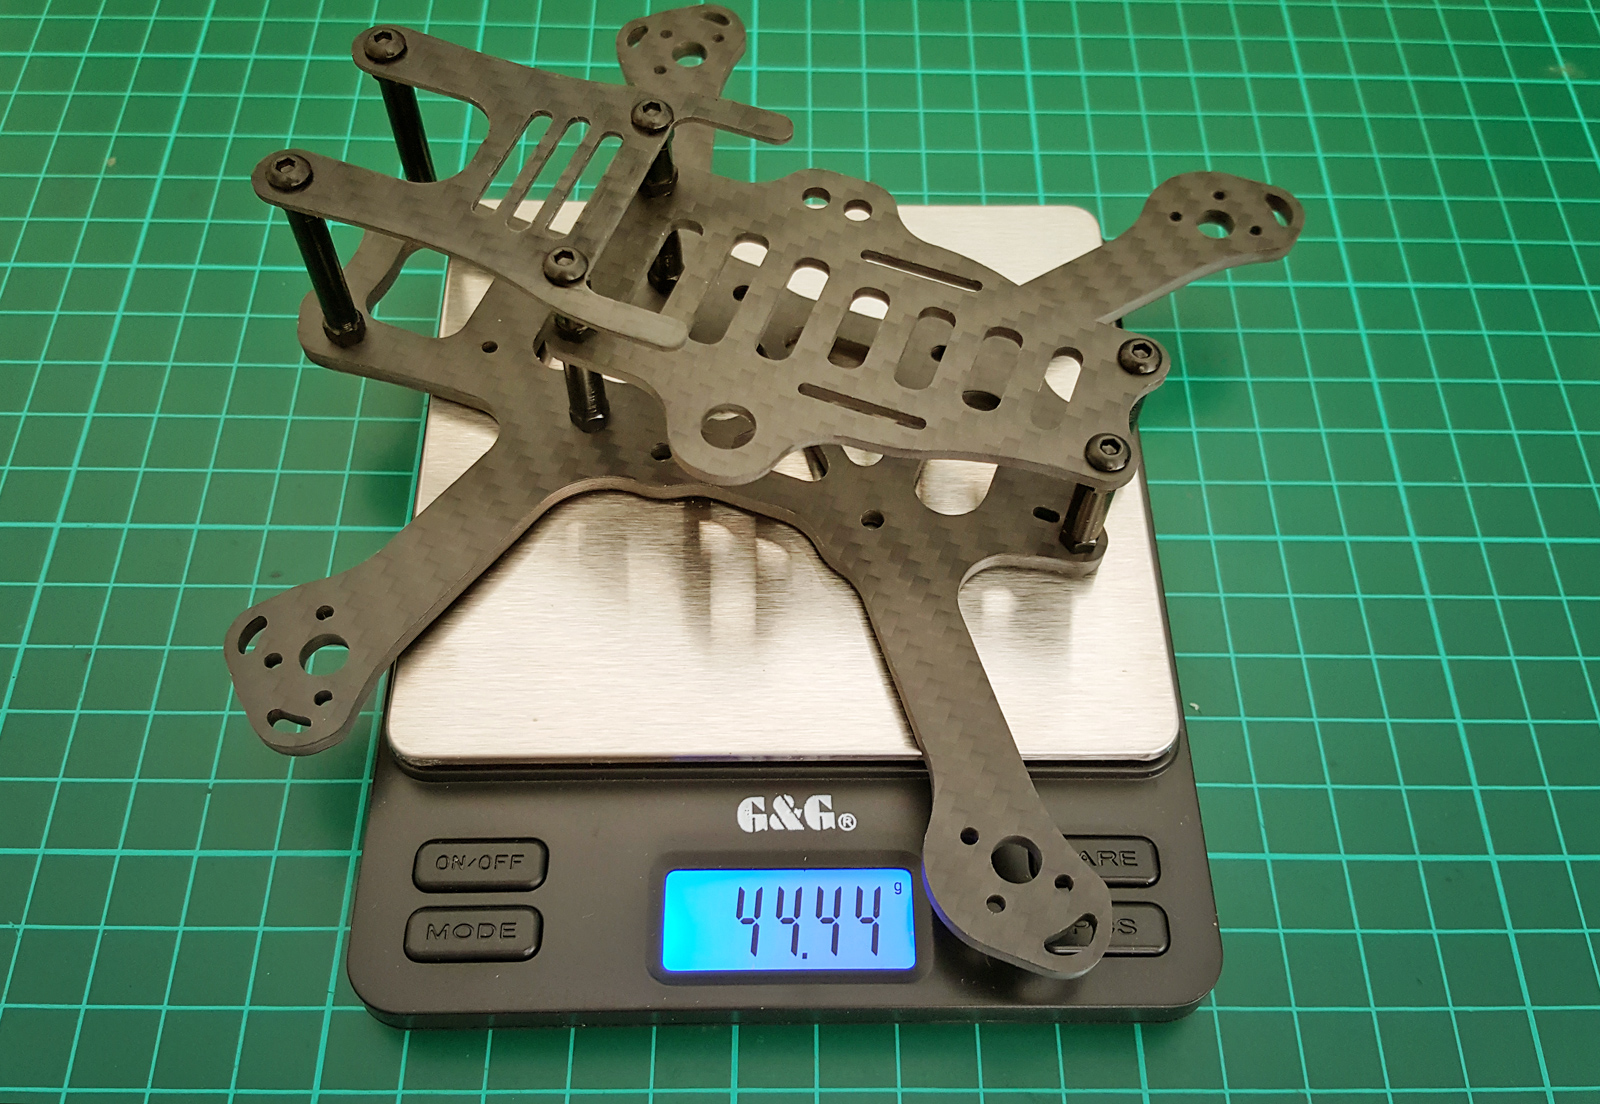
The frame and mounting hardware weights about 44g.
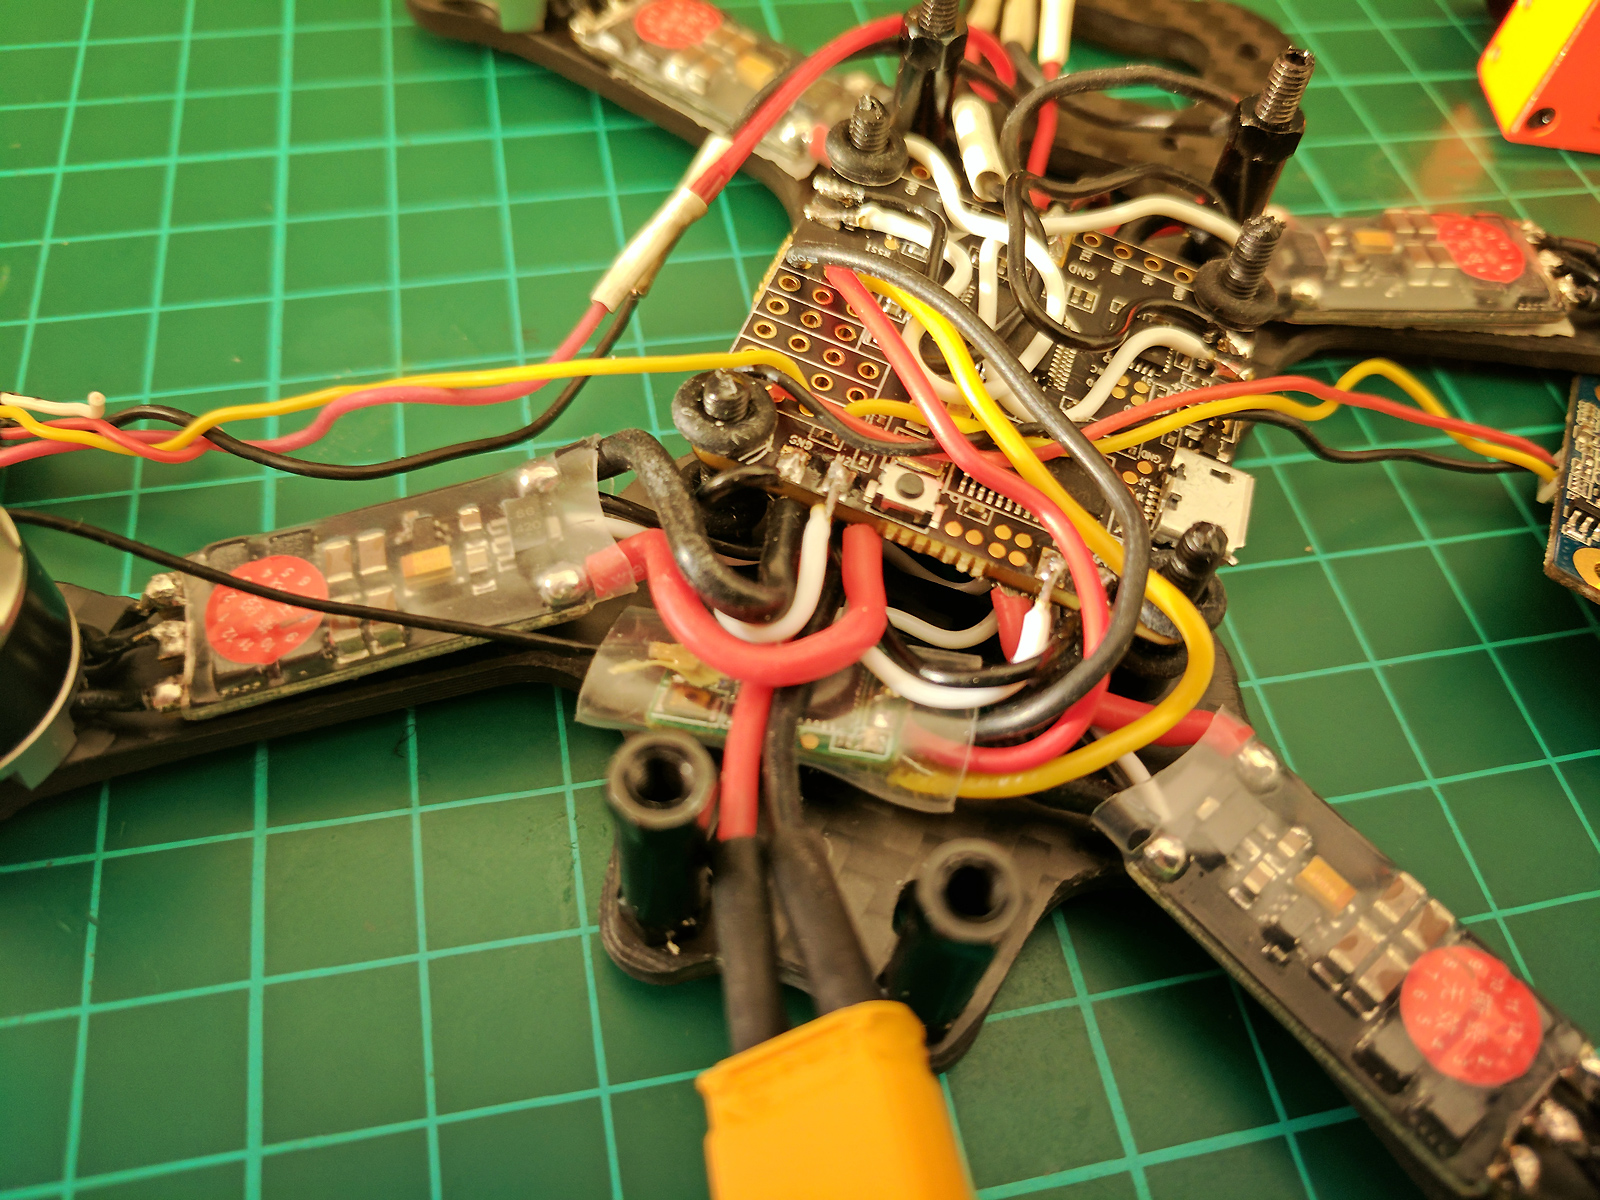
I start with a quick test to check possible mounting configurations. Space is tight and the USB connectors and SD card slots of the boards tend to push against one another so I decide to mount the flight controller backwards, as the motor mapping can be changed easily in Betaflight.
I solder the battery wires and do a first test of the flight controller. I flash Betaflight 3.2 RC5 firmware.
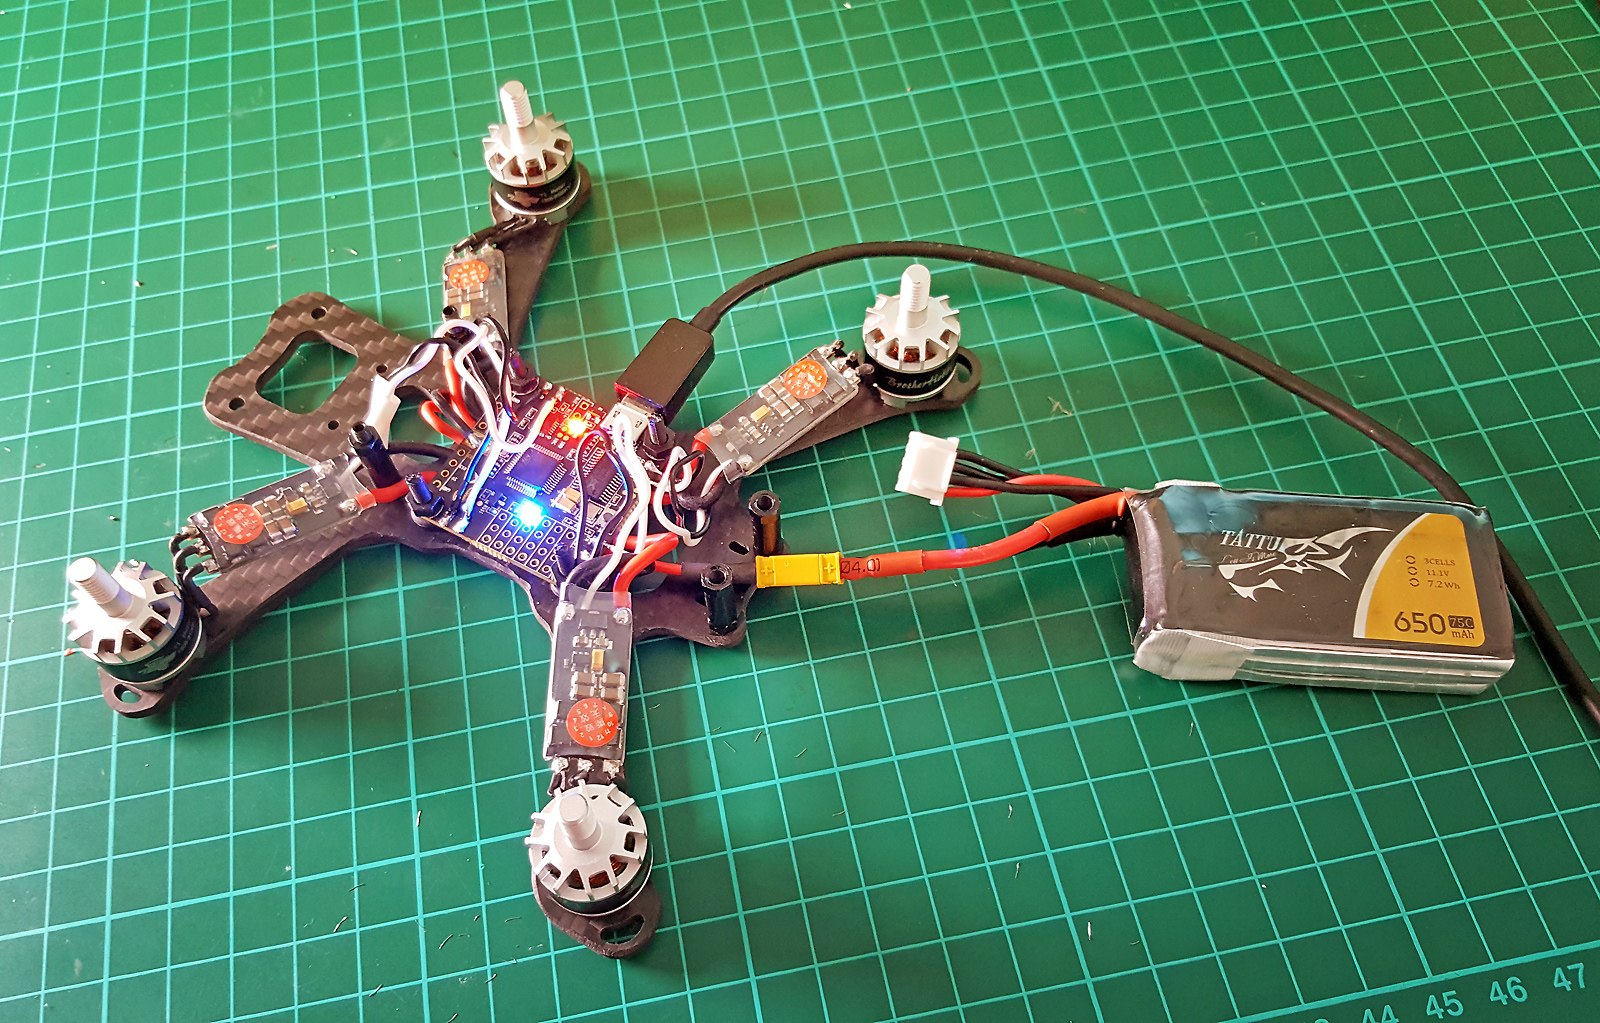
I solder the ESC and motors. For motor testing I mount them on the frame to avoid twisting the cables. I test that all motors are spinning. I change the motor mapping in Betaflight CLI using the resource command and also note down which motors are spinning in the wrong direction (I use a “props-in” configuration). I test the general orientation of the board and use Yaw = 180° correction as the board is mounted backwards.
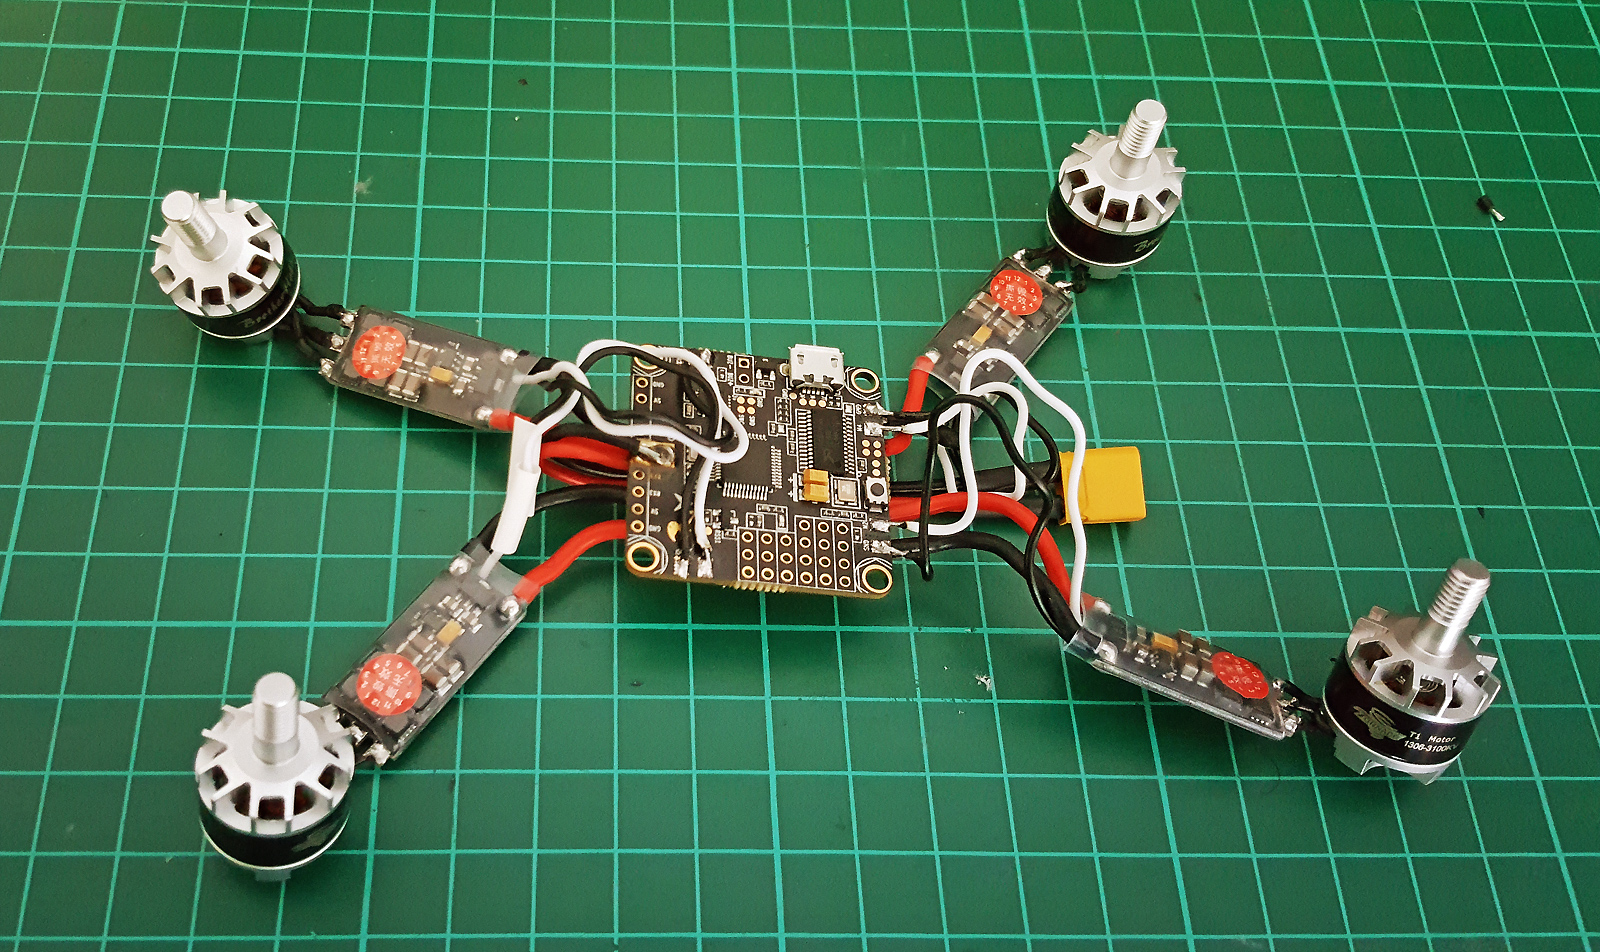
I dismount the motors and resolder the two that need to change their rotation direction.
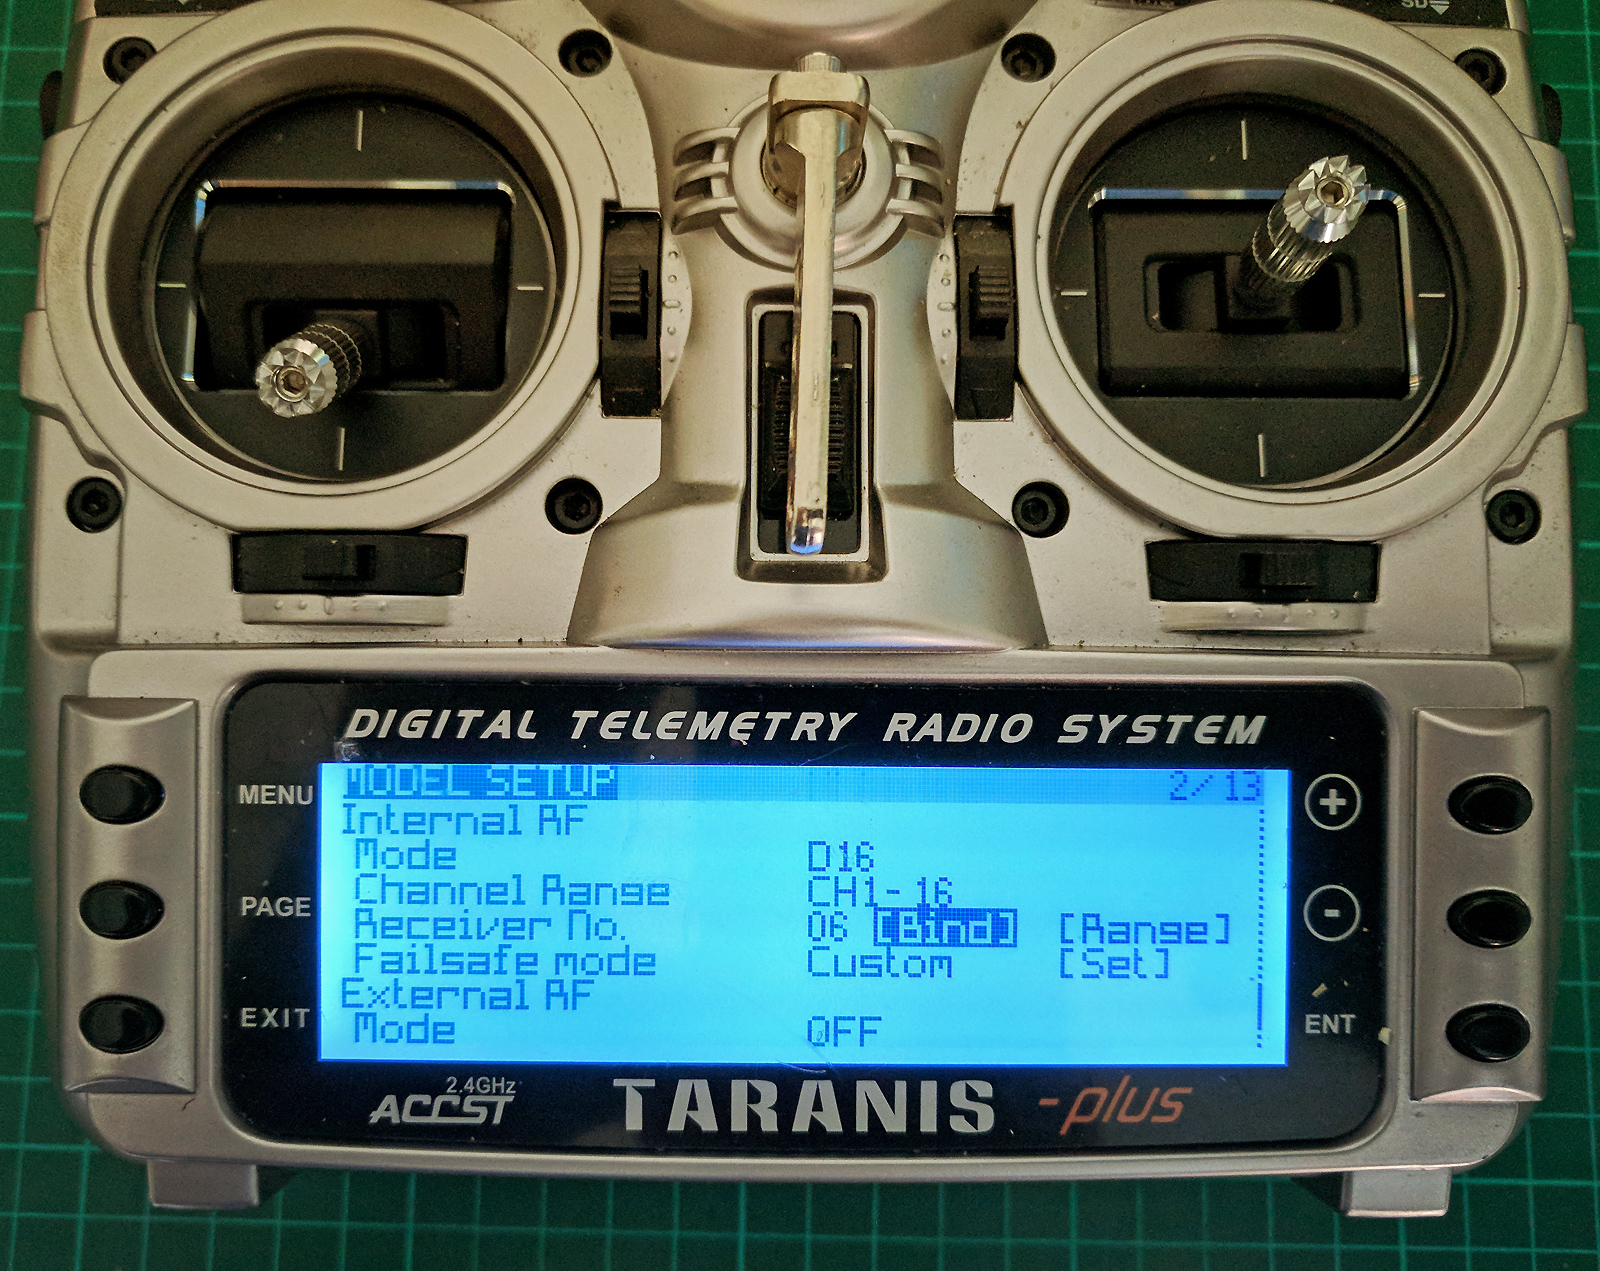
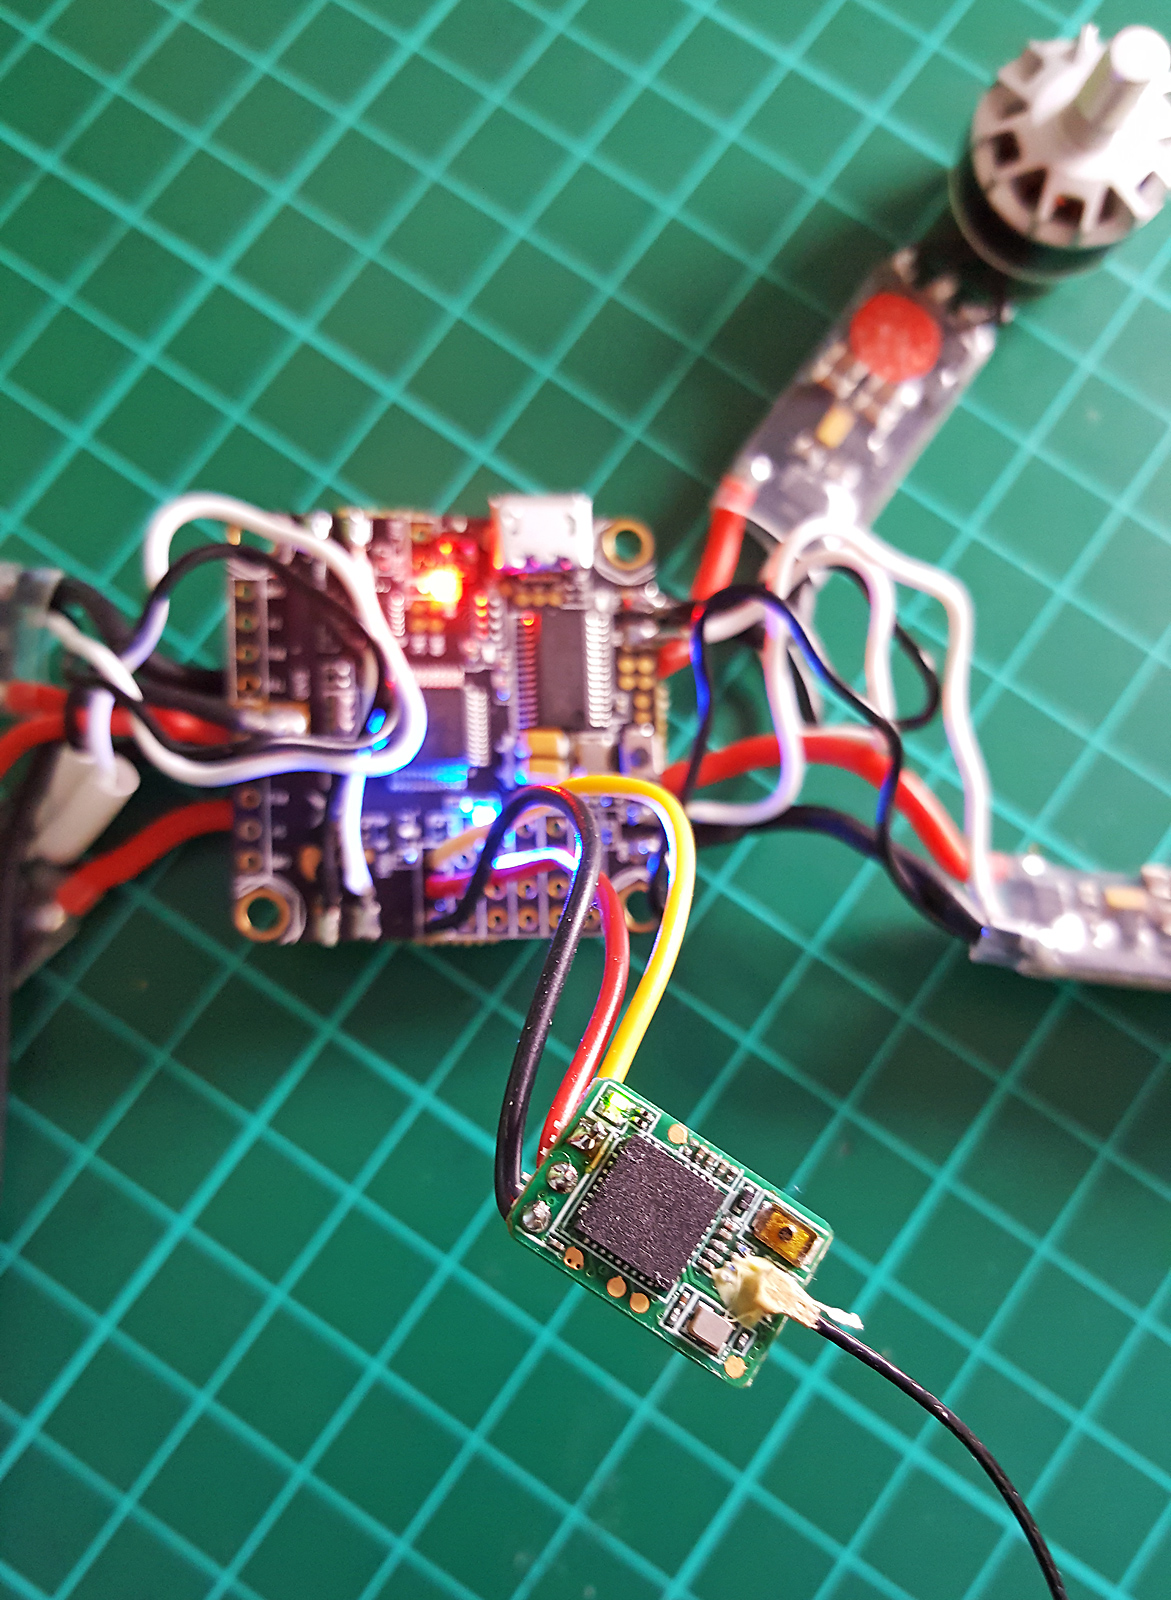
I solder the RC receiver (5V), bind it and test the proper mapping of channels in Betaflight. I calibrate the ESC and configure the throttle range.
I solder the camera, the pololu voltage regulator and the VTX.
I test the FPV system and camera. I install the Wi-Fi module on the Runcam Split and update to the latest firmware.
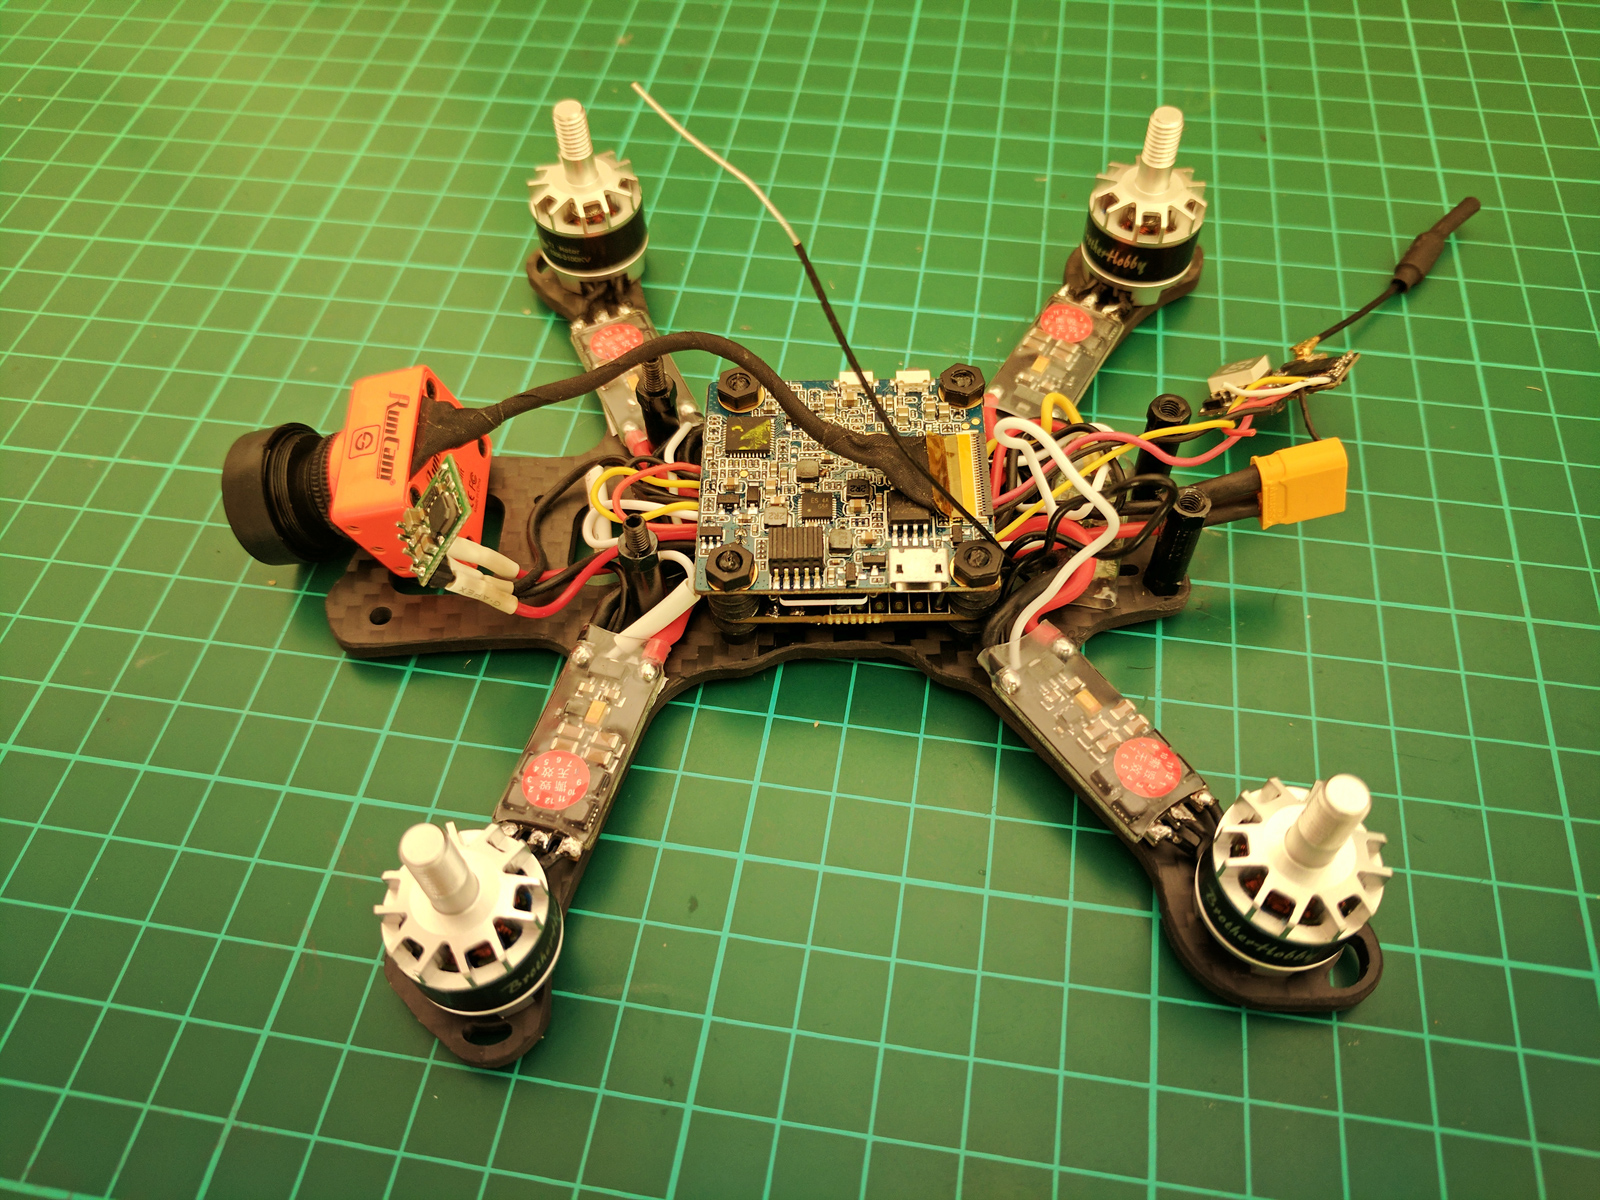
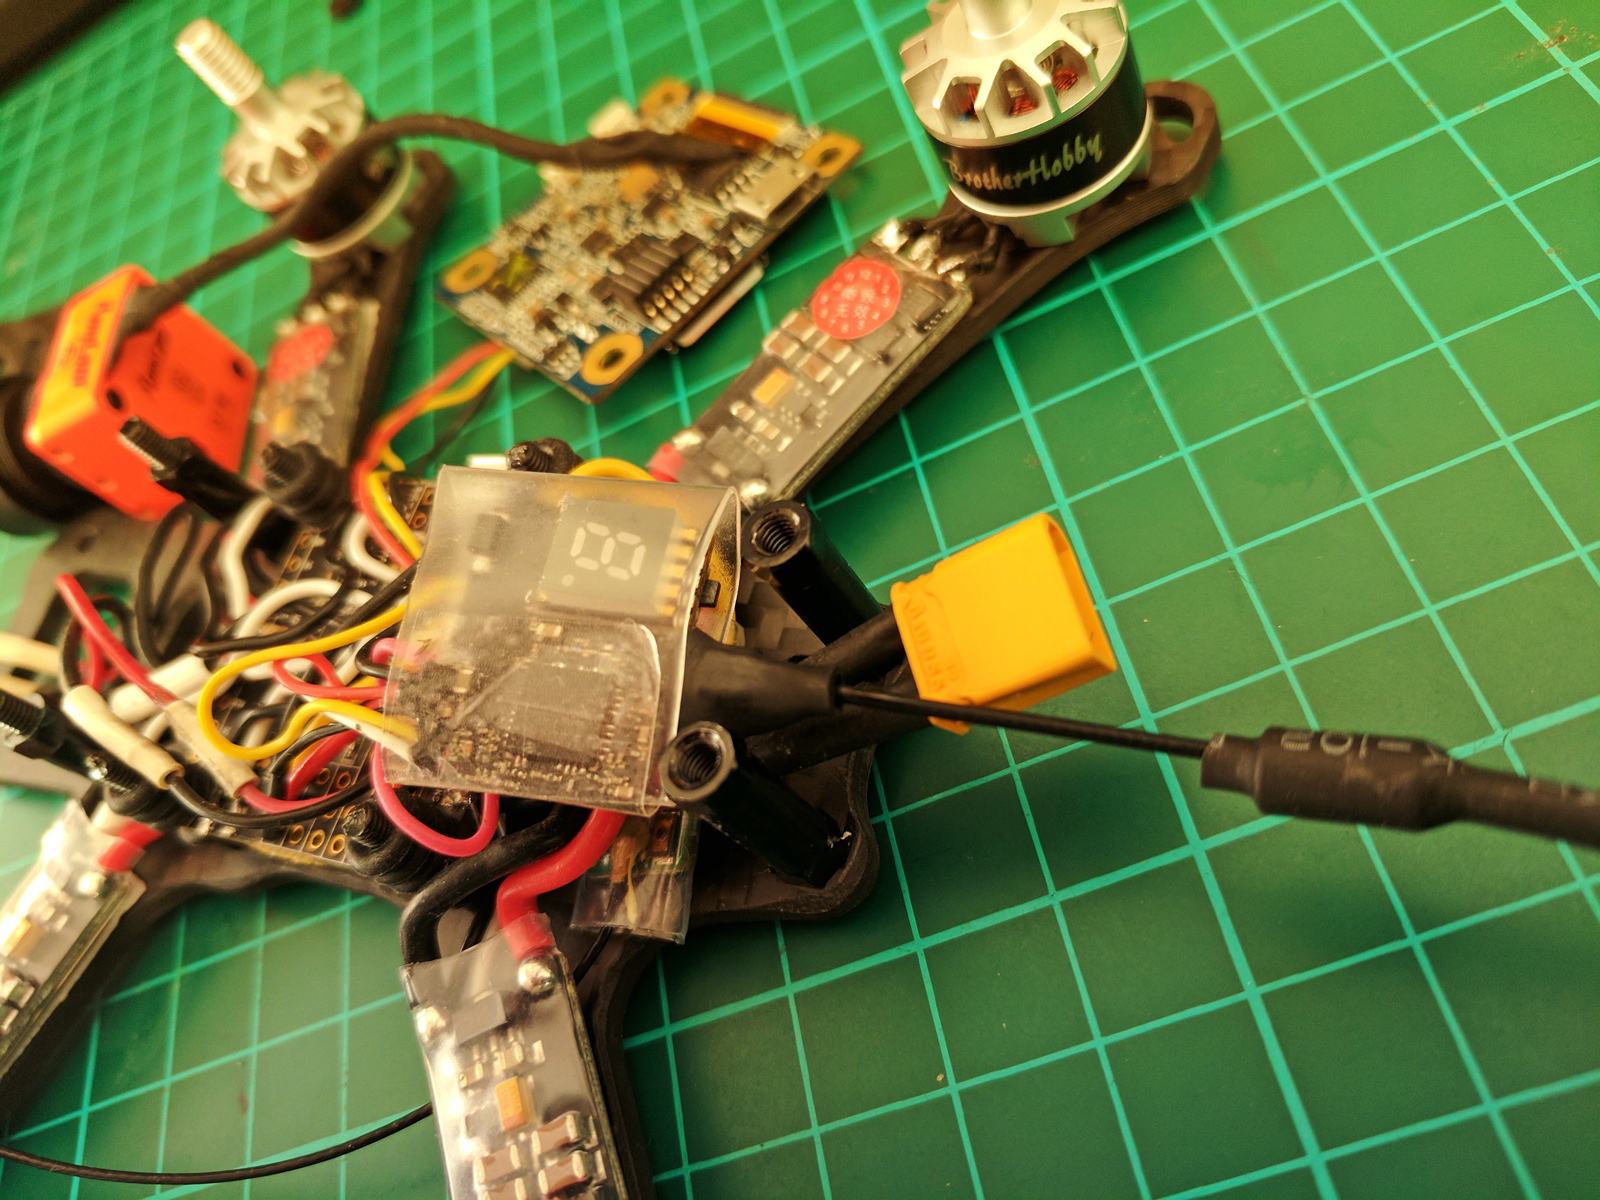
For the final assembly I put the RC receiver and VTX in the back and the voltage regulator in the front. The VTX antenna protrudes directly behind the quad.
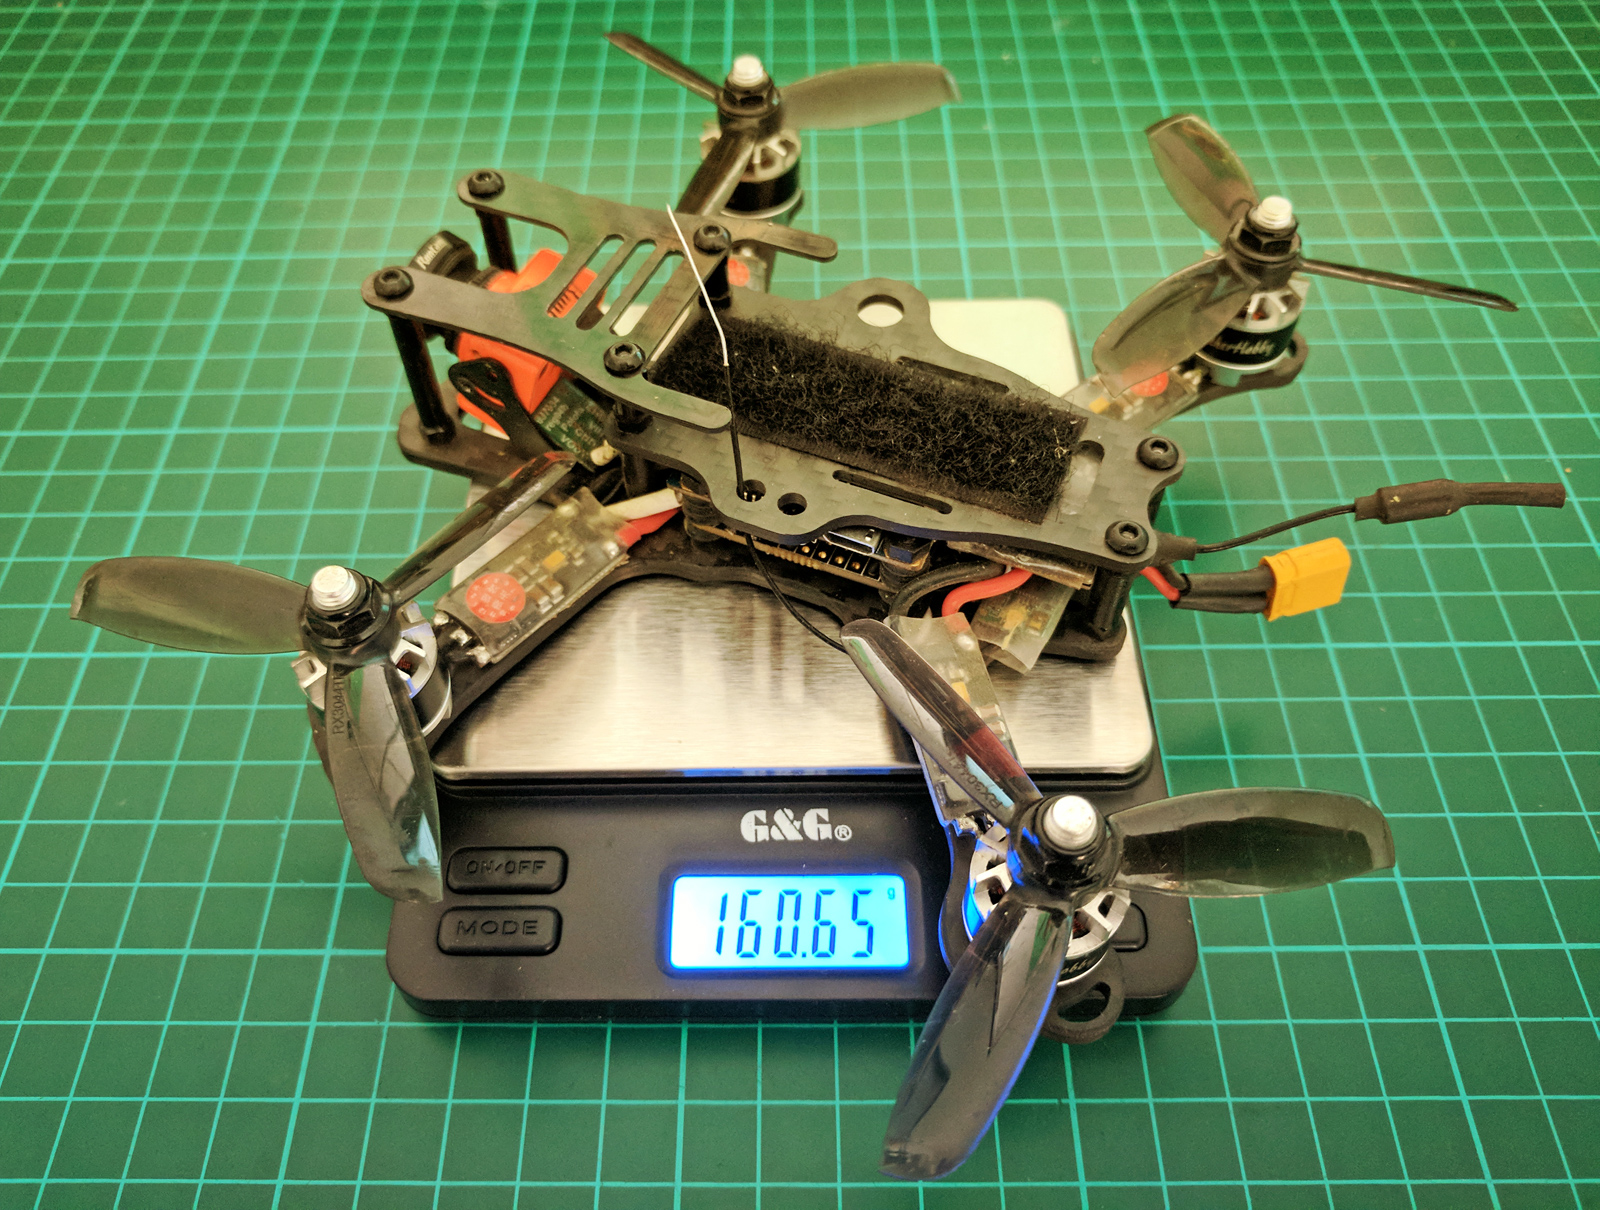
The dry weight is at 160g. The updated version with the 1407 motors is 182g dry. To secure the batteries I use a piece of velcro tape on the frame and on the battery, plus a velcro strap.
To plug the Wi-Fi module I need to dismantle the top plates, but I can retrieve the HD files through the USB port. I always avoid plugging the camera USB and a battery at the same time.
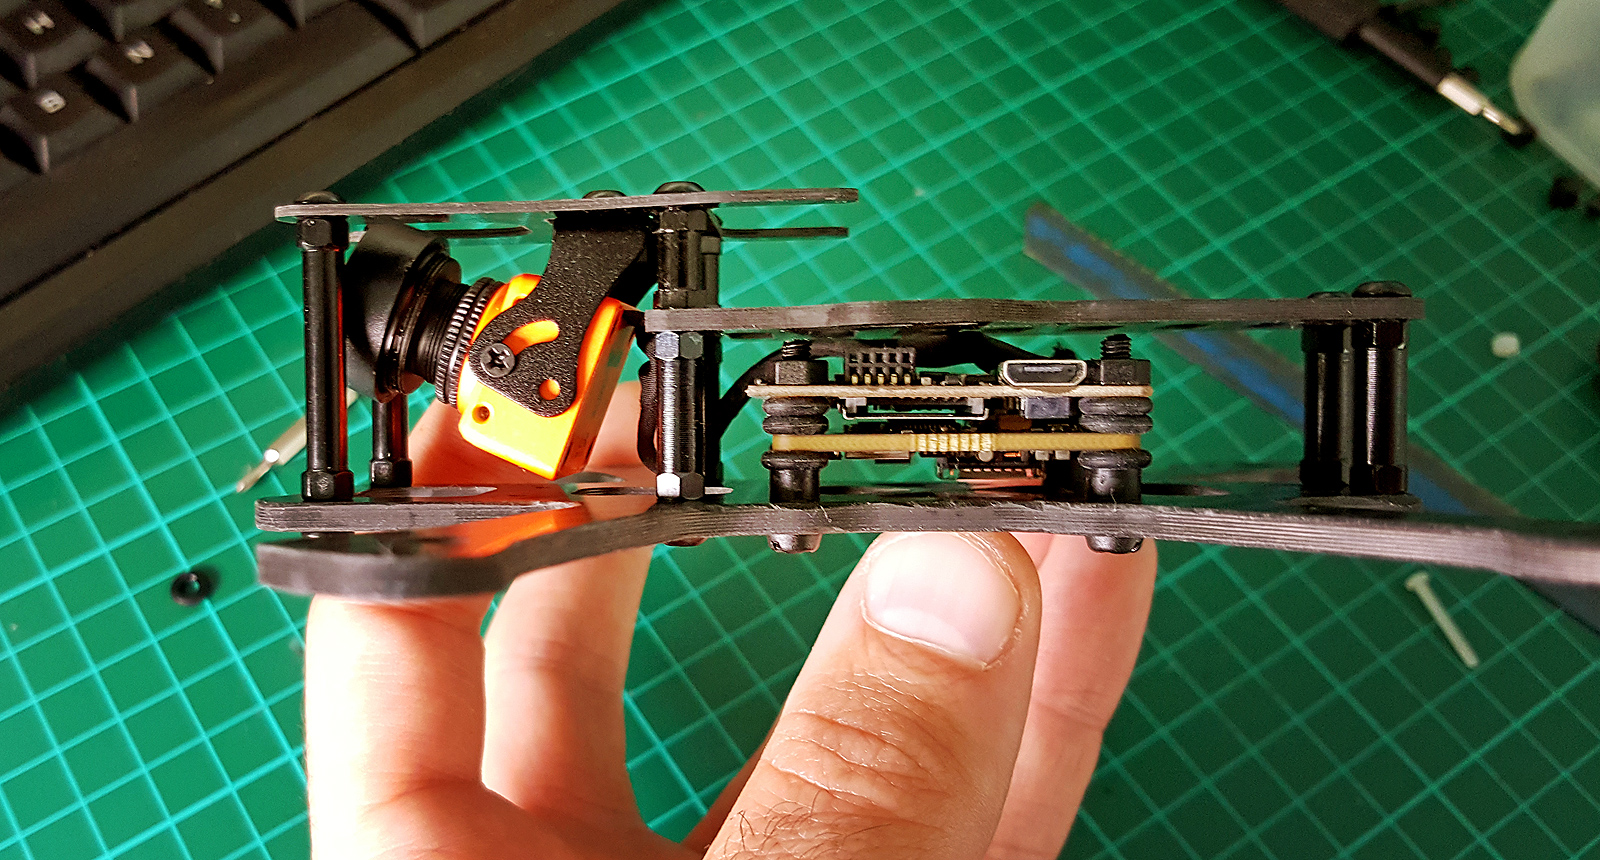
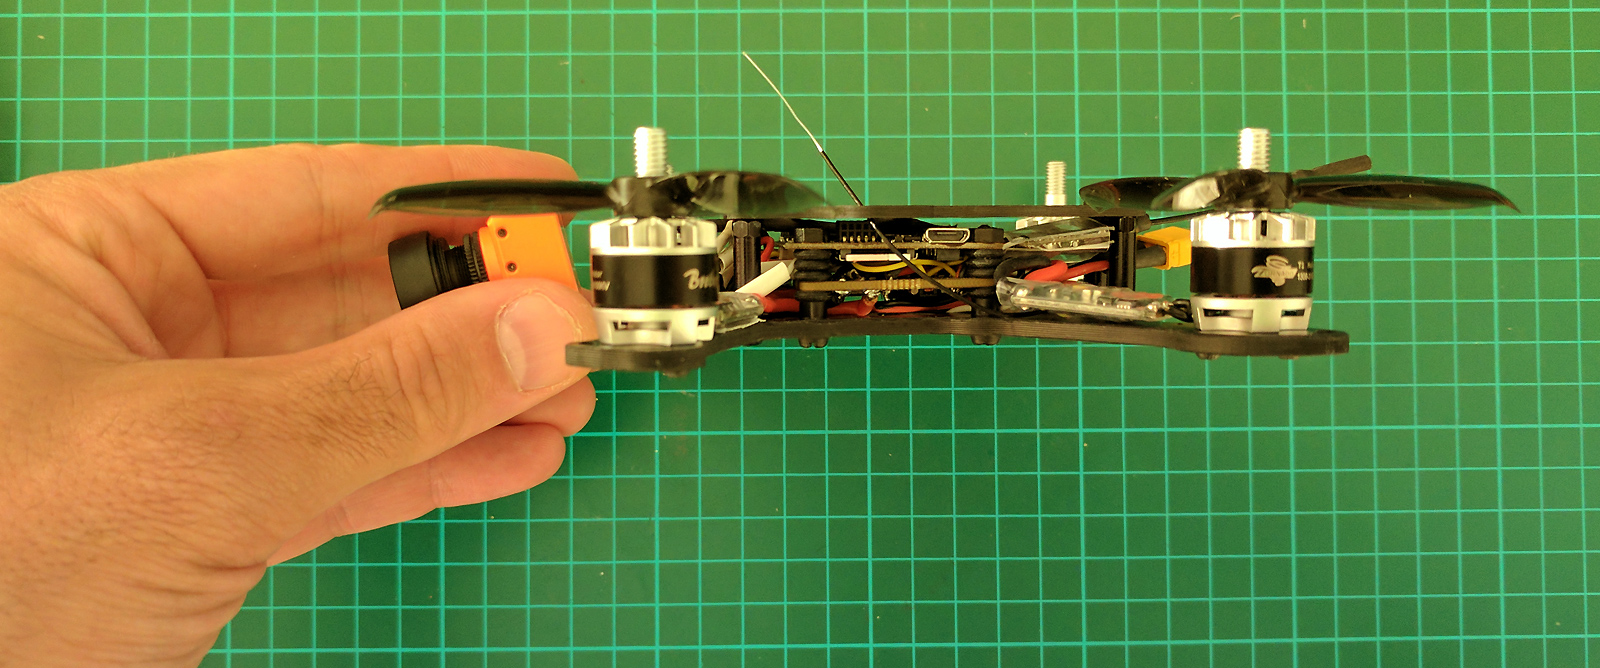
Camera mounting
I made various camera mounting tests to check if the standoffs were in view of the camera. I started with the camera hanging from the top plate but that didn’t allow much uptilt without seeing the standoffs in the corners of the HD videos, which I absolutely do not want to see. I ended up mounting the camera to the bottom plate which gives about 28° of uptilt before the standoffs become visible. This also moved the camera forward so there’s a bit more room between it and the stack which is nice.
After more testing I’m now soft-mounting the camera entirely, as described in the next section.
Vibrations: soft mounting all the things
For the maiden flight I used the DALPROP T3045 as they are very sturdy and I expected a higher chance of crashes. Unfortunately the first flights were plagued with massive jello in the FPV feed and the HD videos. This seems to be a common issue with the Runcam Split. Switching to the better balanced RotorX RX3044T solved the bulk of the issue, but some remained.
Vibrations come from the motors, props and possibly the propnuts. The problem is that at some throttle values the vibrations from the motors resonates with the frame and get amplified and transmitted to the flight controller and/or the camera. This results in noise in the attitude correction, vibrations of the entire HD image, and “waves” where the image is internally distorted due to the CMOS rolling shutter. To get rid of the issue I soft-mounted as many things as possible.
- I soft mount the motors using dedicated TPU mounts (the same mounts can be used for 1306 and 1407 motors).
- I soft mount the flight controller by sandwiching the board between o-rings.
- I soft mount the sensor board by using a thin piece of foam inside the camera housing, to prevent the board from moving relatively to the lens barrel.
- I soft mount the camera mount itself, using a piece foamy double sided tape, and secure it using a zip-tie instead of screws. This way the camera rests on a cushion but doesn’t wobble during flight.