Joan's web log
This article introduces Kinovea 0.8.26 (download page), and describes the new features and improvements over 0.8.25. This version introduces new kinematic analysis tools and focuses on polishing existing features and fixing bugs.
General
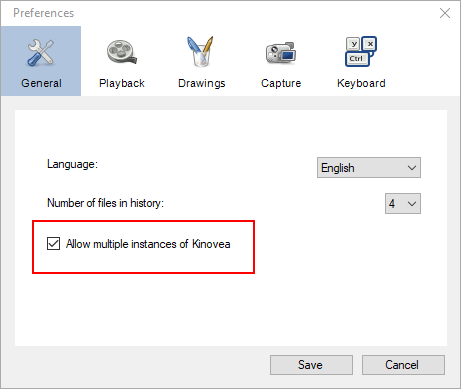
It is now possible to run multiple instances of Kinovea at the same time by changing the option under Preferences > General > Allow multiple instances of Kinovea.
Annotation
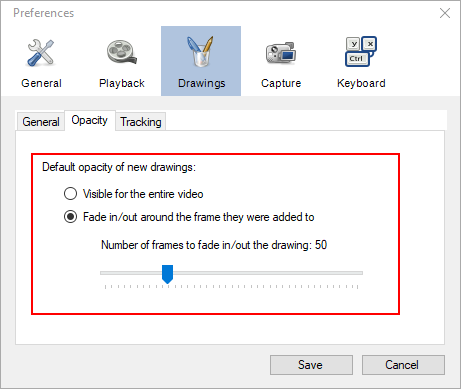
The management of the opacity of drawings was simplified. Instead of having a needlessly complicated dialog on each drawing with a “persistence” value, all the drawings are now either always visible or follow a global option for fading in/out of their reference frame.
The global value for this fading is set under Preferences > Drawings > Opacity.
Measurement
General
It is now possible to export the time series of trackable drawings like the angle tool and custom tools. See Angular kinematics and Linear Kinematics below.
The “data analysis” menu has been removed from individual trajectory drawings and placed in a global menu at Tools > Linear kinematics, as the window now combines data for all trajectories. See Linear kinematics below.
Angle tool
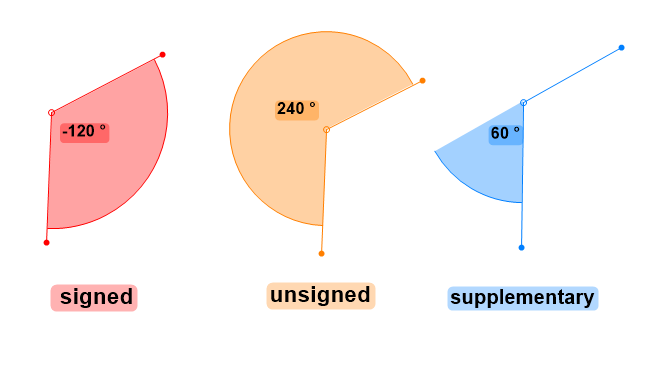
The angle tool was improved to be more versatile. It supports three new options to switch between signed or unsigned angle, change direction from counter clockwise to clockwise, and switch display to the supplementary angle.
The following screenshot shows the same angle object with different options applied.
Linear kinematics
The linear kinematics window is now found under the menu Tools > Linear kinematics and supports multiple sources. You can check/uncheck trajectories to be included in the analysis. The name and color for the plot are taken from the objects configuration.
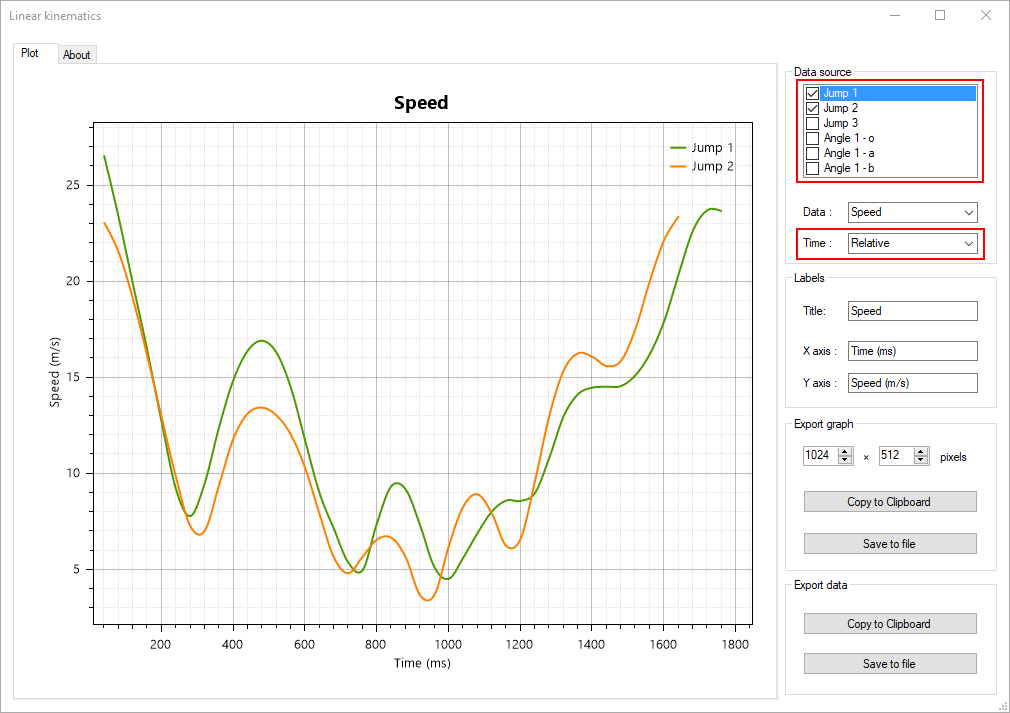
When comparing several trajectories, three time models are available: absolute, relative and normalized. “Absolute” time will simply respect the original timeframe of the trajectory. “Relative” time will align all trajectories to a common starting point, to compare how they evolve over time. “Normalized” time will stretch trajectories to a common starting and ending point, to compare their “shape” over time.
Exporting trajectory data to CSV will export a common time column first and then one column per trajectory.
The trackable drawings (point, line, angle, custom drawings, etc.) have their individual points included in the trajectories. So if you track and angle drawing, its three points will show up in the linear kinematics window as three distinct trajectories that you can treat as any other trajectory.
Angular kinematics
A new kinematics analysis window has been introduced for angular kinematics. It is available under the menu Tools > Angular kinematics. This window will let you visualize angular kinematics values like angular velocity or tangential velocity for angles that were tracked in the video.
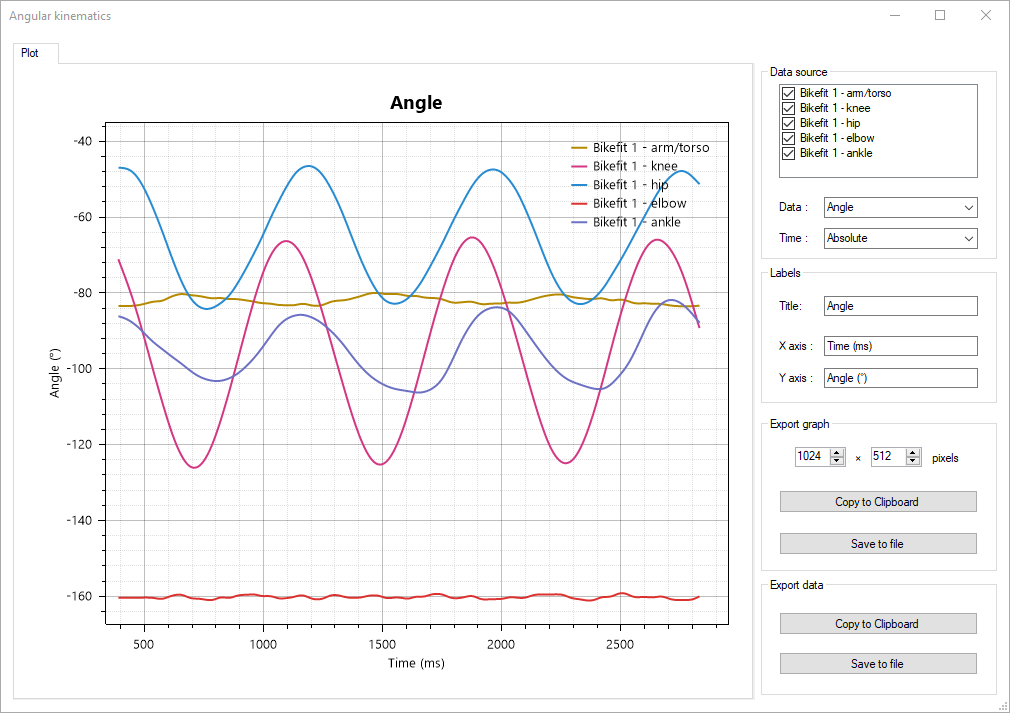
Trackable drawings that have an angle, including custom tools, will show up in the list of sources and can be checked/unchecked. The time options “relative” and “normalized” are also available.
Angle-angle diagrams
A new analysis window for angle-angle diagrams has also been introduced at Tools > Angle-angle diagrams. These are diagrams that directly map the angular value of two angles against each other. This is useful to get insights into the dynamics of a specific motion. A typical example is to plot the knee angle against the ankle angle over a few cycles of running or cycling. The overall shape of the cyclic curve can be compared to the literature or between athletes or sessions.
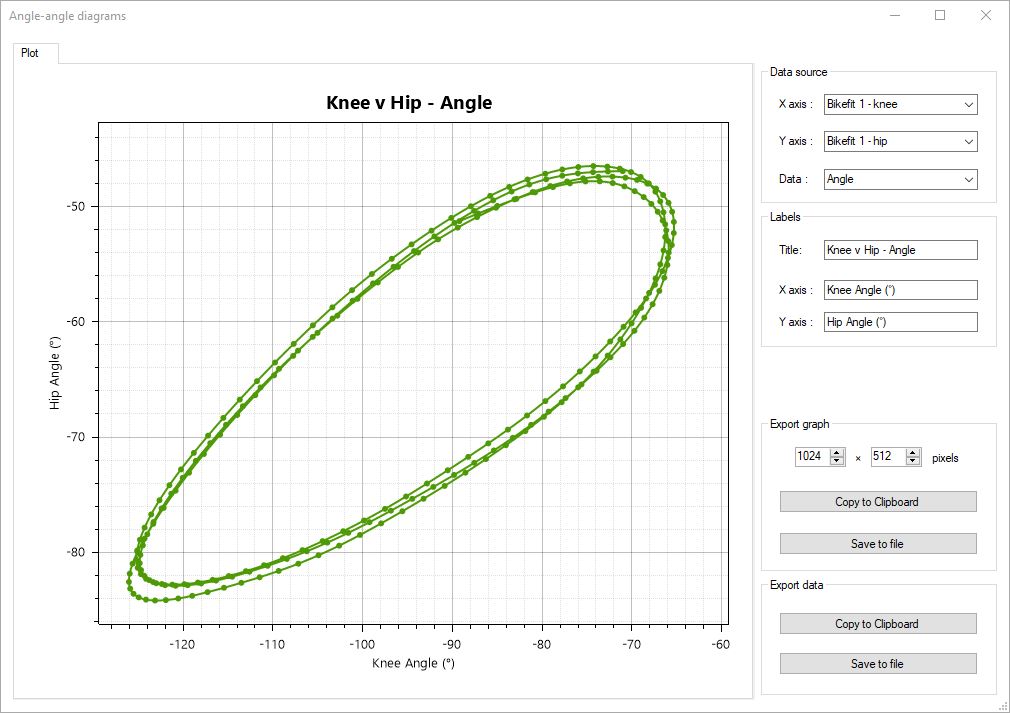
The diagram is defined during the overlapping period of time of the two angles considered. The angle-angle diagram will also work for custom tools that contain angles. This is possibly the most practical way to use this feature, for example with the bike fit tool or a tool dedicated to the angles you want to review.
In addition to the raw angle value, it is also possible to map the angular velocities or tangential velocities of two joint angles against each other.
Tracking
If you need to track the same joint angle at distinct times in the video, create several angle tools and track them independently. Each tracked point has an underlying timeline of positions that is not exposed to manipulation. Filling this timeline with discontinuous sequences will cause unexpected behavior.
It is now possible to completely bypass the data filtering by changing the global option under Preferences > Drawings > General > Enable coordinates filtering. Note that this filtering is to remove the high frequency noise created by the digitization process, it should be left enabled unless you intend to run your own filtering algorithm on the data.
Capture
Recording modes
In order to restore the ability to record delayed videos, a new recording mode option is available in the global preferences under Capture > Recording.
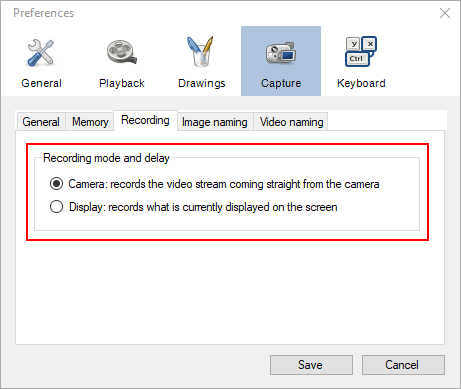
The Camera recording mode is the default and will record the video stream straight from the camera to disk, compressing it on the fly if necessary. This is the best performance path. For some combinations of framerate and image size, it is the only usable option.
The Display recording mode will let the video go through the buffering system for the delayed live feature and the composition system for mosaicing (if active), and it is the final image that will be recorded to disk.
Here is a simplified diagram of the capture pipeline and where each recording mode operates.
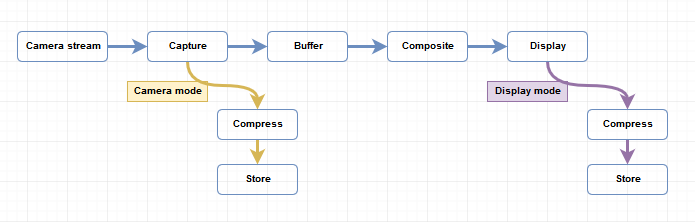
As an example, let’s say we have a 10 second delay active and we record for 20 seconds. Let’s define the press of the record button as time “0”.
- In camera mode, the video will contain the action from time 0 to 20.
- In Display mode, the video will contain the action from time -10 to +10.
Camera modules
The Basler camera module was improved and updated to support Pylon 5 API.
An entirely new camera module was written to support IDS cameras.

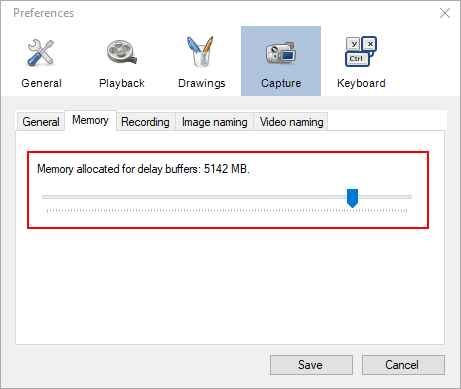
Memory buffers
The maximum allocated memory for the capture module is now based on whether Kinovea is currently running on 32-bit or 64-bit Windows. This should allow for much longer delay when memory permits. The option to increase the memory allocated for delay buffer can be changed under Preferences > Capture > Memory.
Feedback
Please post your feedback, bug reports, usability issues, feature suggestions, etc. on the forum in the following thread.