Joan's web log
3D illustration and painting are exciting art forms enabled by VR platforms: it is now possible to set paint strokes in mid air and create shape, volume and lighting. In this article I describe my experiments on transforming real scenes into 3D paintings.
- From photographs to 3D paintings
- Artistic considerations
- Oculus Quill data format
- Limitations and future directions
- References
From photographs to 3D paintings
Photos to point cloud
The workflow starts with the conversion of a set of photographs of the scene into a point cloud containing pockets of high density around regions of interest.
The initial step is a standard photogrammetry workflow to get a point cloud of the scene. I use AgiSoft Photoscan.
The dataset used in these examples is the Hugo dataset from pi3dscan.com.

Fig. 1. Source photos, camera alignment and sparse point cloud creation.
In practice I import the photographs and go to menu Workflow > Align photos, and use the “High” and “Generic” options. I verify in the outliner that the number of cameras marked as aligned is close to the total.
The software will look for salient features in all photographs and match them together from one frame to another. The resulting point cloud is thus sparse: it only comprises the locations of the matched salient features. In my initial experiments I directly used this sparse point cloud to perform the conversion to VR paint strokes, but I quickly found that creating a dense point cloud first and then sub-sampling it selectively allowed finer control over the end result.
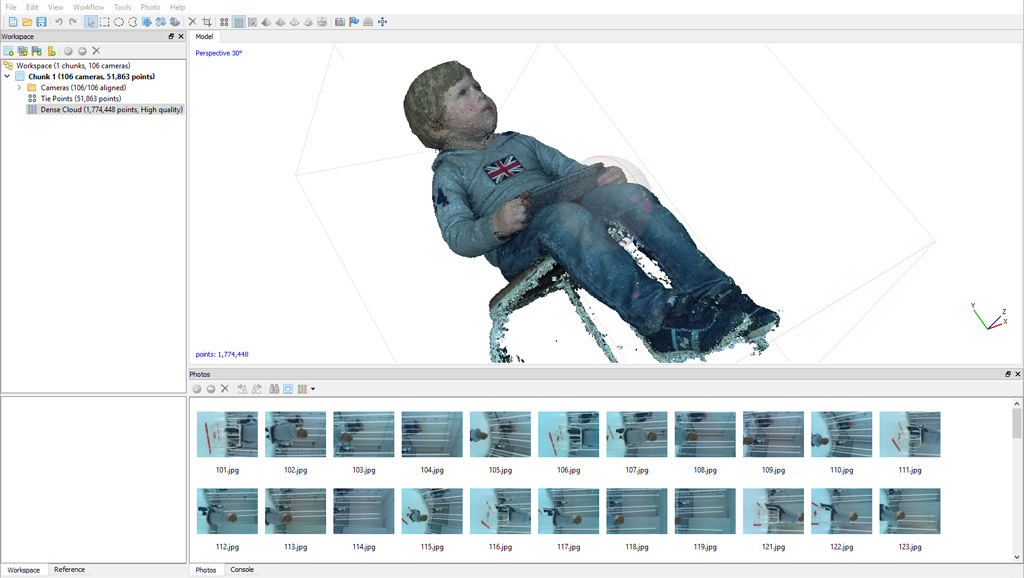
Fig. 2. Dense point cloud of the subject of interest with minimal clean up. The dense cloud has 1.7M points.
Still in Photoscan I reset the view, rotate and translate the scene, and shrink down the region box around the part of the scene I’m interested in. This will exclude other parts from the dense cloud construction which is more computationally intensive than photo alignment. I then go to menu Tools > Tie points > Build point cloud, and use “High” and “Generic” options. Finally I go to menu Workflow > Build dense cloud, and use Quality: High option. For this application it is more important to have a greater number of aligned images to cover the subject rather than use the higher quality options.
This creates a very dense cloud with possibly millions of points. Rendering the point cloud should give a faithful representation of the original scene.
Using the selection tool I clean up the dense cloud of any unwanted island of points. Usually bits from the background will show up around the subject when the algorithm couldn’t quite compute their depth correctly. This cleanup is only done superficially on large islands, a finer cleanup step can be done later in VR in a more precise and natural way.
The point cloud in its current form contains too many points to be usable for this application: we are not recreating a perfect model but a simplified, non-photorealistic version of the scene. Besides, the final number of paint strokes cannot be too high as we want to retain the ability to explore the VR painting in real time.
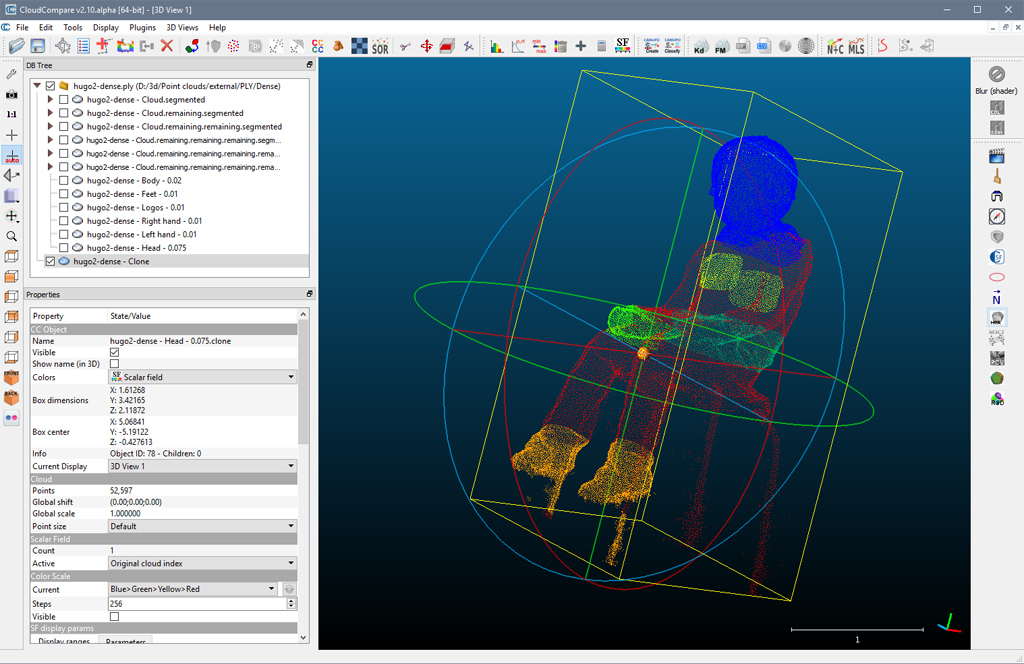
Fig. 3. The dense point cloud is split in several segments with different densities. The final cloud has 52K points.
I selectively sub-sample the point cloud to create regions of interest with higher fidelity than others: a character’s face and hands in a portrait or an interesting building in a landscape.
To perform this step I open the dense point cloud in Cloud Compare and using the Segment tool I split the main cloud into several clusters. I use “subsample by space” on each cluster, using trial and error on the value to get the overall final number of points down to somewhere between 10K and 100K points total, while leaving relatively more points in region of interests.
I merge all the segments together and export the result.
Point cloud to 3D strokes
In Oculus Quill, paint strokes are lists of points in 3D space, with stroke-level attributes like the brush type as well as point-level attributes like color or opacity. The paint strokes are collected in layers, themselves collected in a hierarchy where each layer has a local transform to its parent layer’s basis. This creates a virtually infinite canvas. The data format is detailed in Oculus Quill data format below.
I wrote a program that ingests the point cloud, analyzes it, and generates a set of paint strokes in Quill data format. I used the Point Cloud Library (PCL) to open the point cloud exported from Cloud Compare. Using PCL the point cloud is analyzed to estimate surface normals and a K-D tree is built to accelerate neighborhood lookups. The practical way that points are converted into paint strokes is detailed in Artistic considerations below.
PCL estimates normals that are not necessarily consistent throughout the surface. This is not really a problem for this application though and I’m not inverting normals that would be pointing inwards.
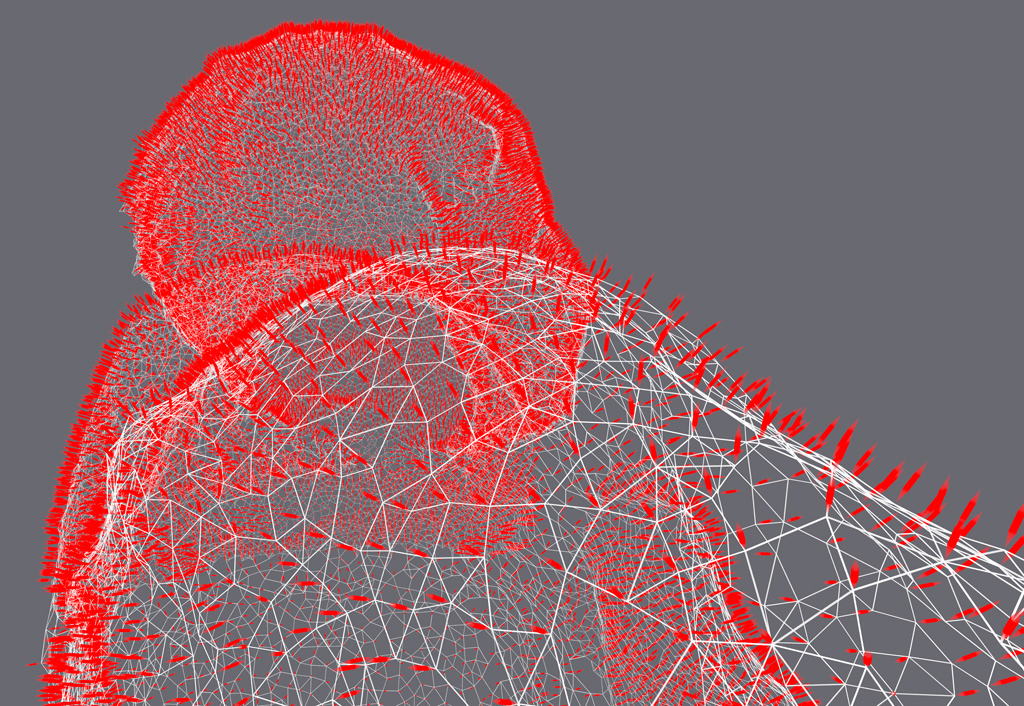
Fig. 4. Surface normals at each point estimated by PCL and visualized in Quill as thin red strokes on top of a pseudo-wireframe.
Compositing and post processing
It’s interesting to note that VR is probably the most efficient and natural user interface to perform a number of operations in this workflow. Compositing several subjects can be done very easily and precisely in Quill using the transform tools. Cleaning up the mishaps of the photogrammetry process is also very intuitive and natural in VR, where we can more clearly see using depth cues from stereo and motion parallax. Recoloring textures can be done in situ. Polishing the model to add hair strands or other organic shapes is also more easily done directly in VR.
Artistic considerations
Pointillism
The most basic transformation is to turn each point of the cloud into a small blob of paint around the underlying point location.
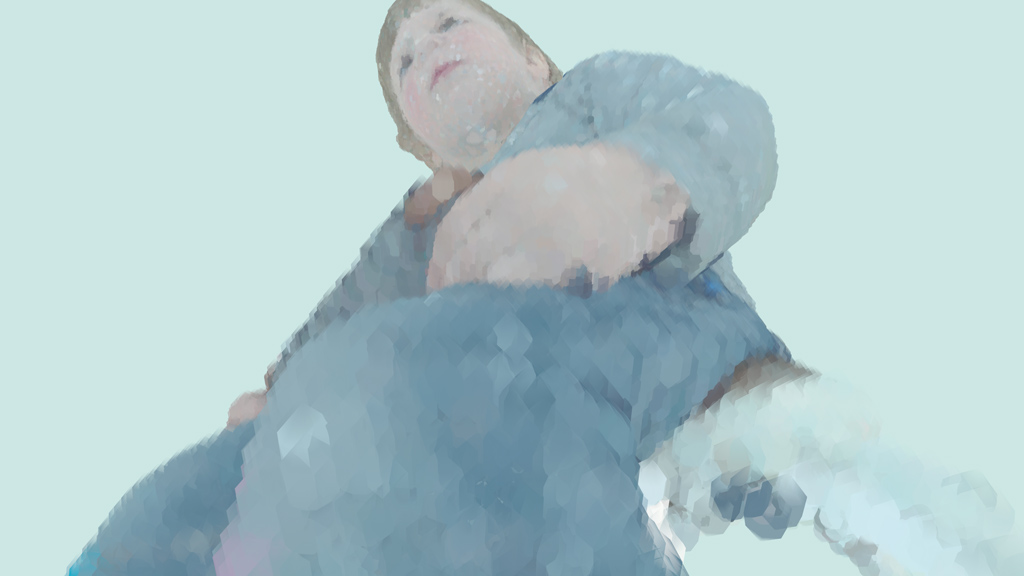
Fig. 5. Each point converted to a small volumetric blob.
Strands
Using the same basic approach, we can make the strokes look less like points and more like what a painter would have performed, by lengthening them, making them follow the local surface tangent, and introducing randomization in the opacity, orientation, length and width attributes. The end points of the strokes are also tapered off to simulate the way strokes are manually laid down in VR using the pressure sensors on the Touch controllers.
By counting the number of neighbors in a given radius we can compute the local density at each point. This can be used to reduce the size of the strokes in high density areas, making them look more detailed.

Fig. 6. Flowers. Each point is independently transformed into a somewhat painterly stroke.
The following video shows several scenes created with this technique.
Unfortunately this style suffers from what we could dub the “birdman” look. We have to set the length of the stroke above a minimum value in order to fill the gaps in the surface, but in doing so the strokes are too long and make the subject look like it is covered in feathers or wet fur. Part of the problem is that the computed surface normals are not perfect and strokes will have their end points above or below the ideal surface.
Random walk
A better algorithm is to pick a point and perform a random walk among its neighbors. This way we guarantee the stroke will stick to the surface.
Since the points are scattered relatively uniformly it is possible to find a suitable width that will tend to fill gaps without introducing too much overlap.
As a stroke is now made of several data points, we can set the color of each stroke vertex to the color of the underlying point. Quill will interpolate color between vertices yielding a smooth, watercolor-like transition over the subject surface.
Similarly to the previous algorithm, the width of the stroke is parameterized by the local density of the point, such that denser areas look more detailed. I use the stroke starting point to compute the density and do not change it along the stroke length other than to taper off end points.
All parameters are randomized within a small range around their nominal value.
To minimize stroke count, when a point has been visited by a stroke it is no longer considered for starting new strokes. In addition, the points visited during a given stroke are also avoided in the random walk, to minimize loops.
The number of steps in the random walk as well as the number of neighbors considered for each step can also be randomized within a range. However I empirically found adequate values for various scenes to be 8 steps and 12 candidate neighbors at each step. Various alterations to these values did not really impact the end result in any meaningful way.
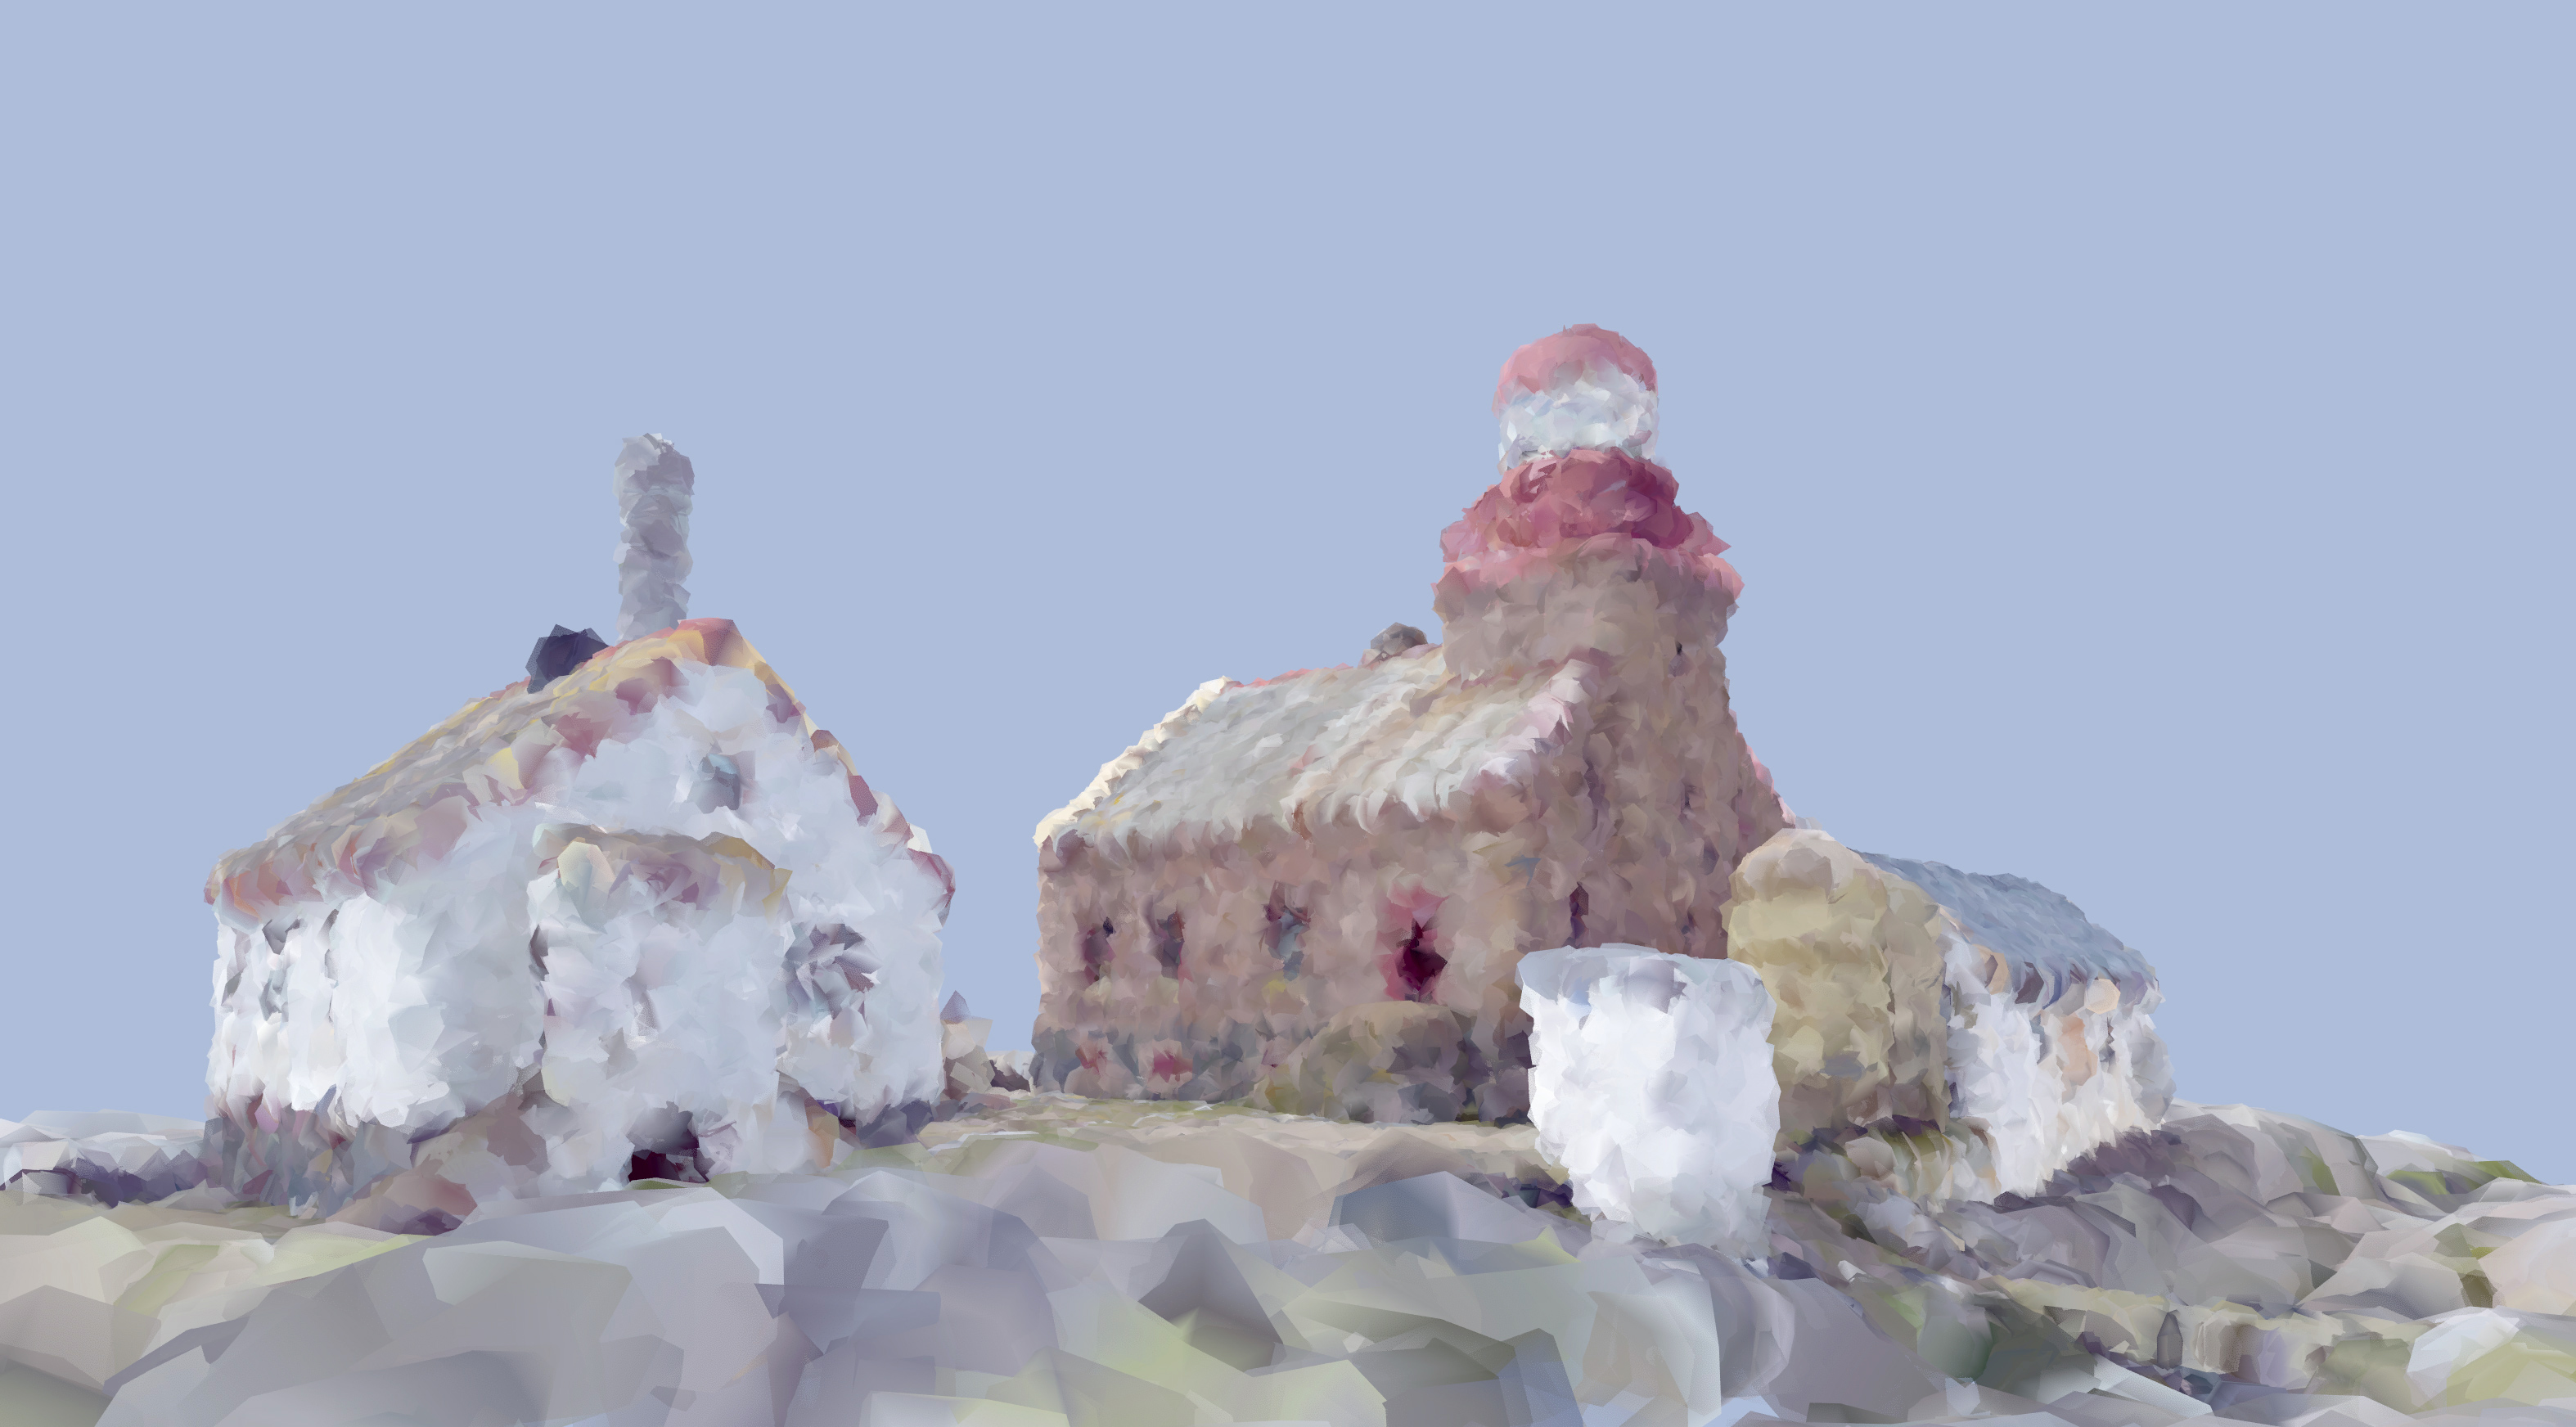
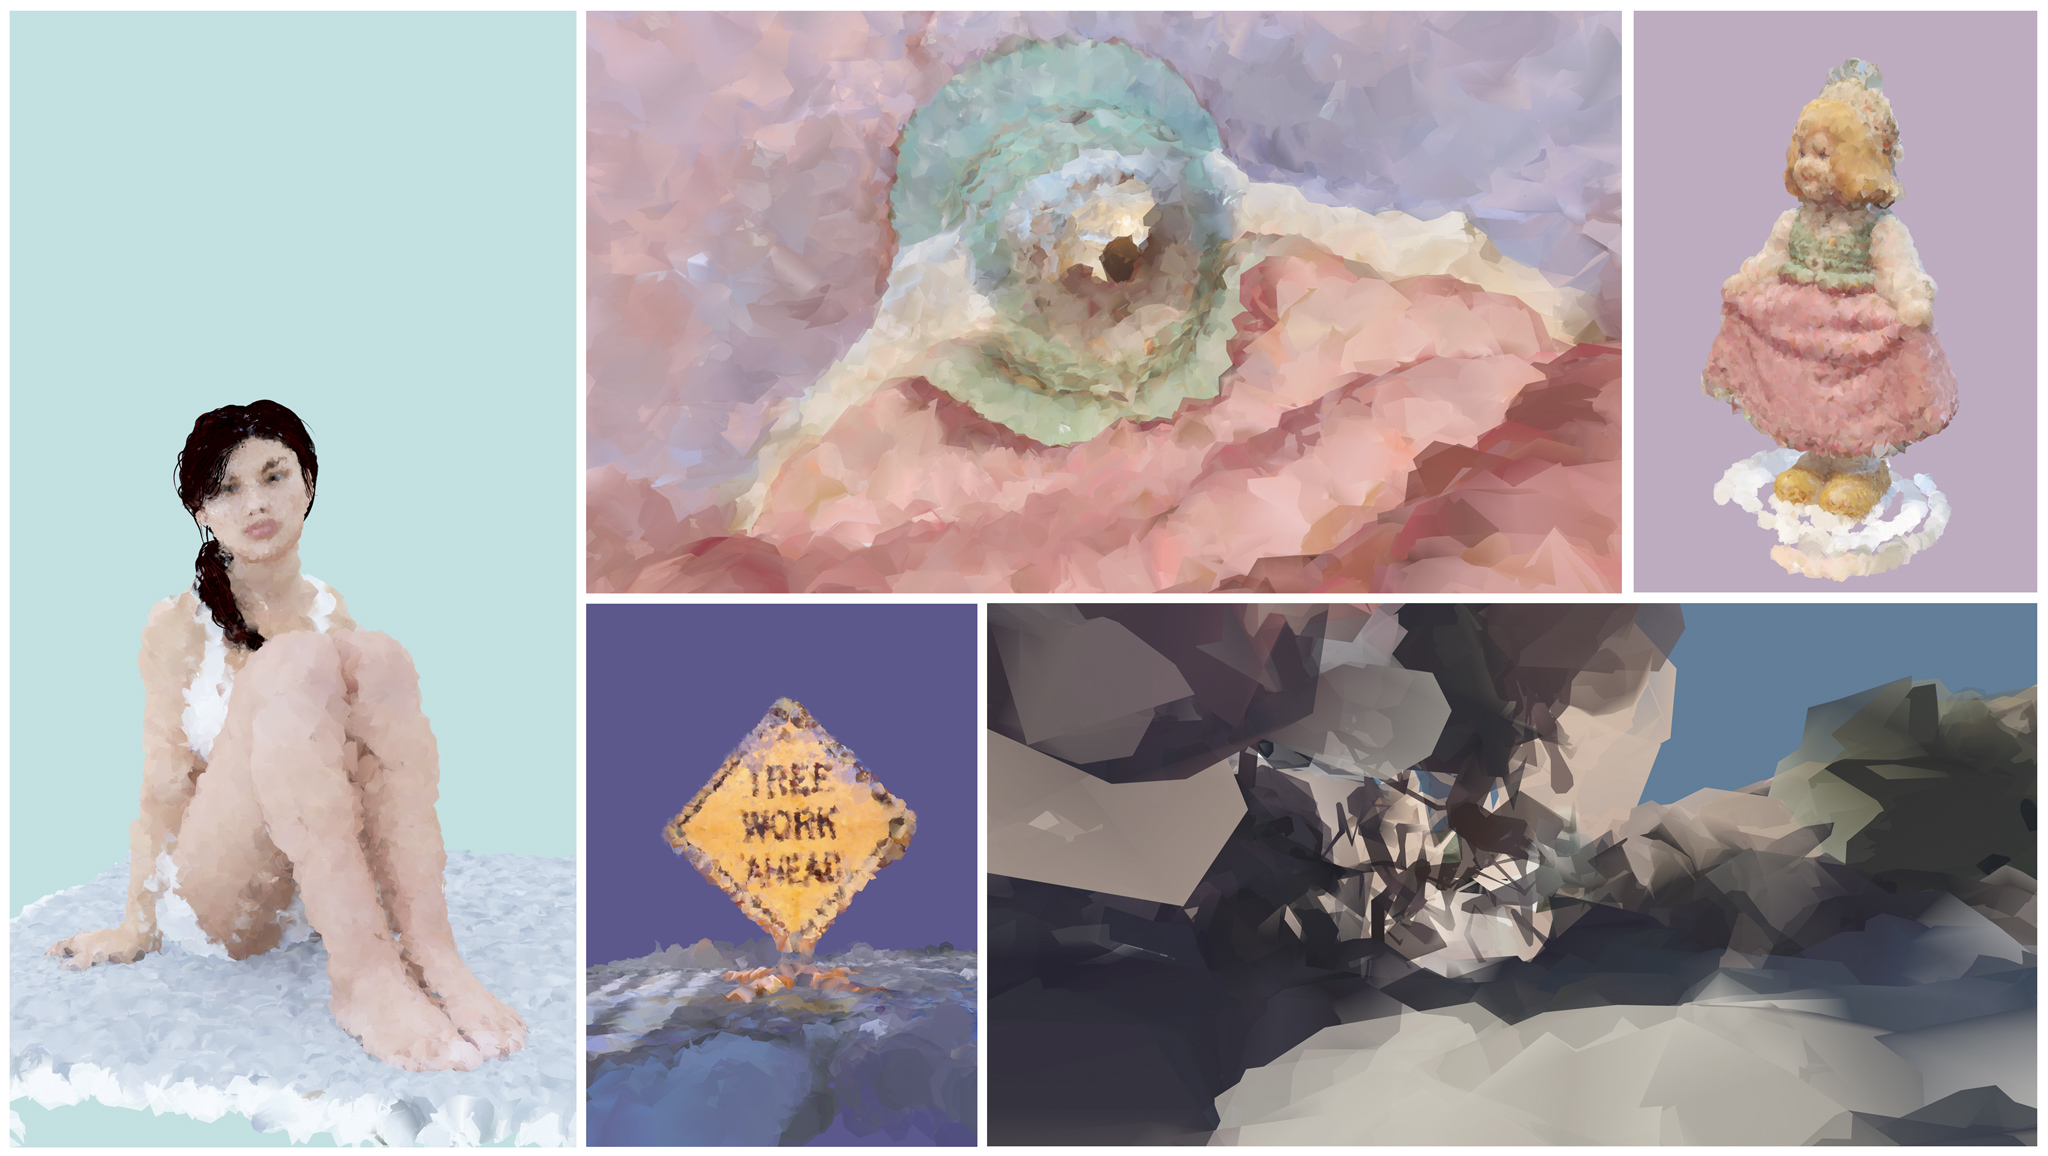
Fig. 7 a & b. Snapshots of scenes using paint strokes generated by random walk in points neighborhoods.
The result of this approach is also shown in the video at the top of the article.
You can download the Quill scene of “The lighthouse on the Torbjørnskjær island” of fig. 7a. in this style here: island-quill.zip (6.93 MB). The original photograph set come from SenseFly.
Other styles
Here are more abstract styles I played with.
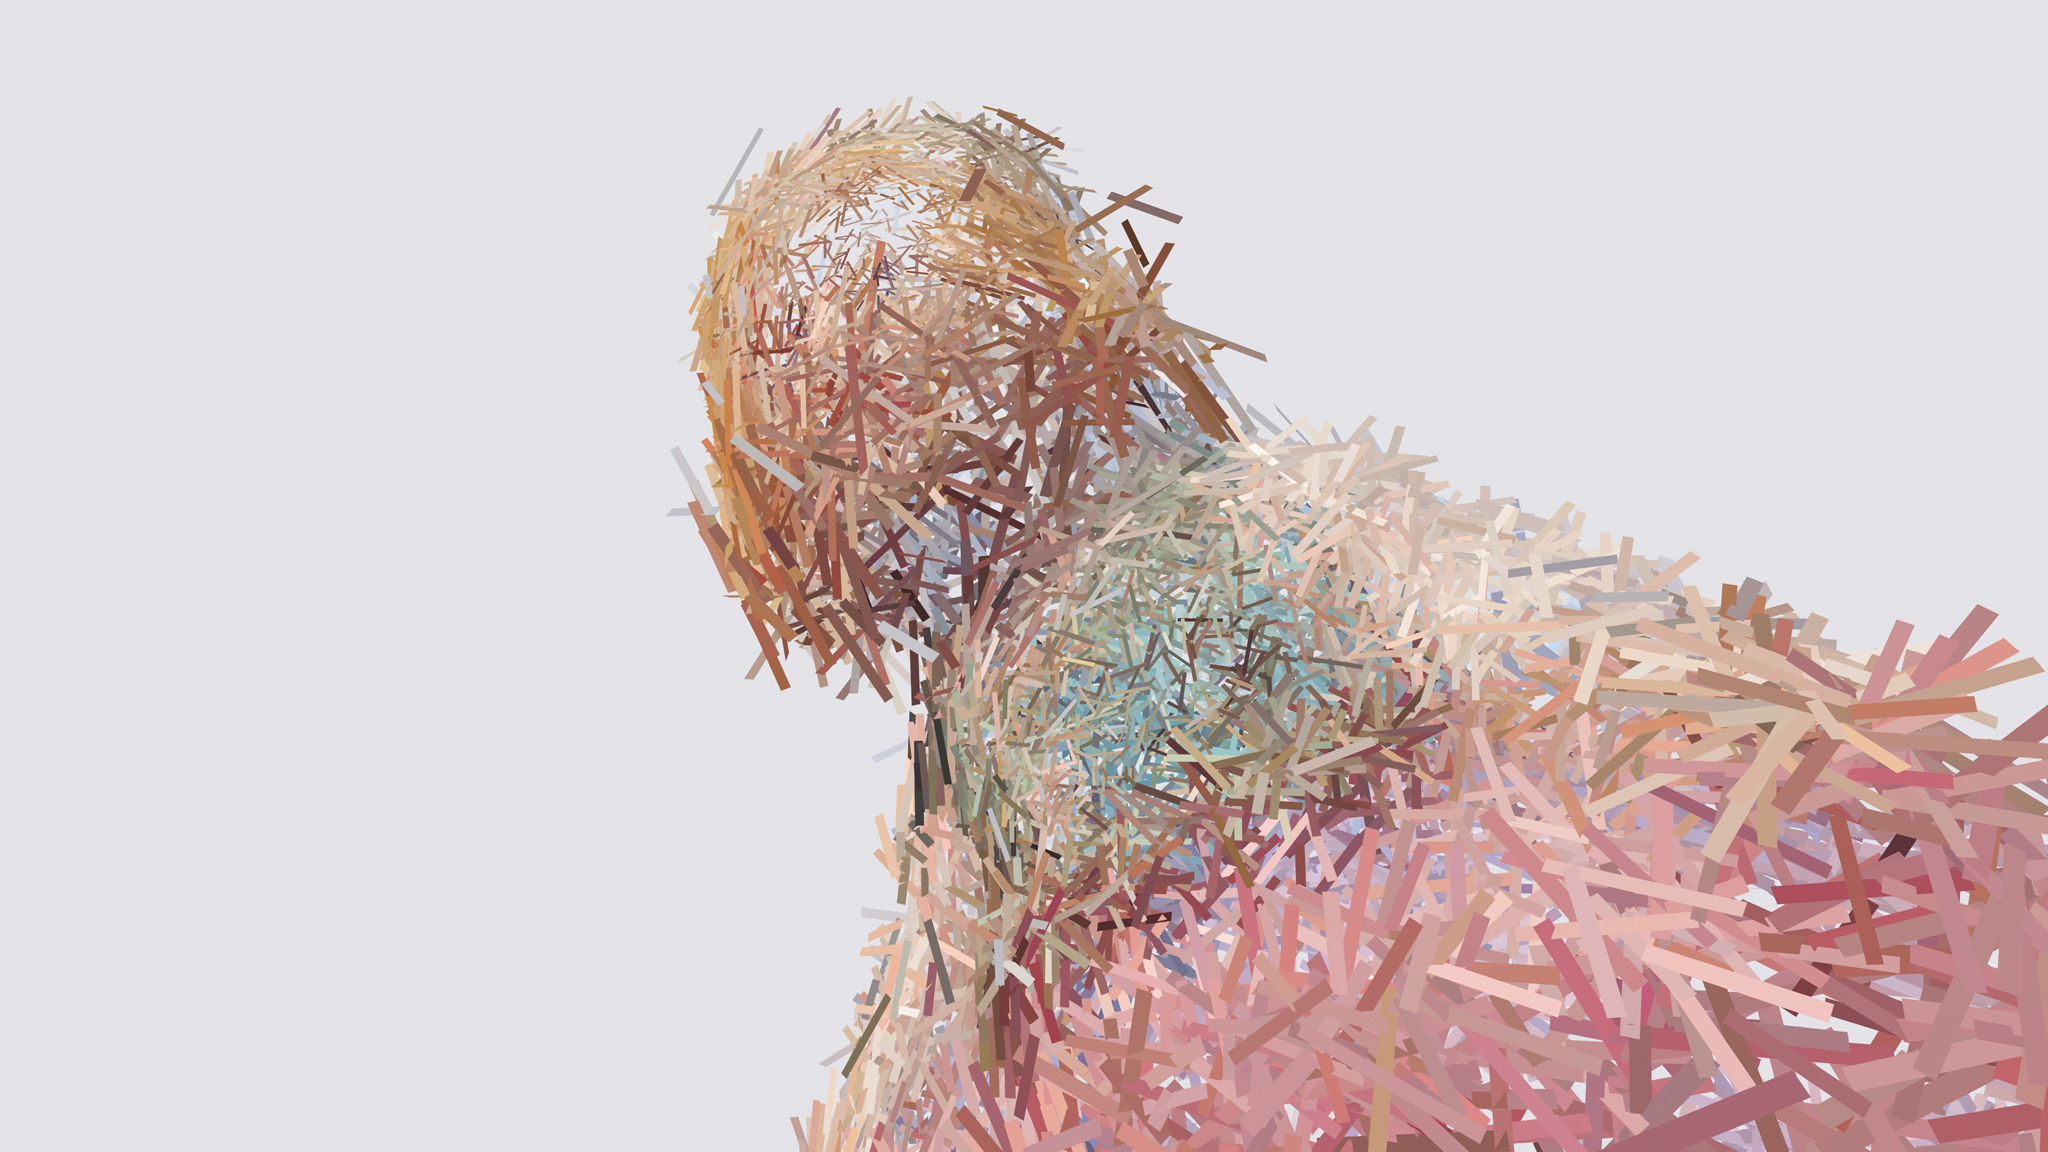
Fig. 8. Matchsticks.
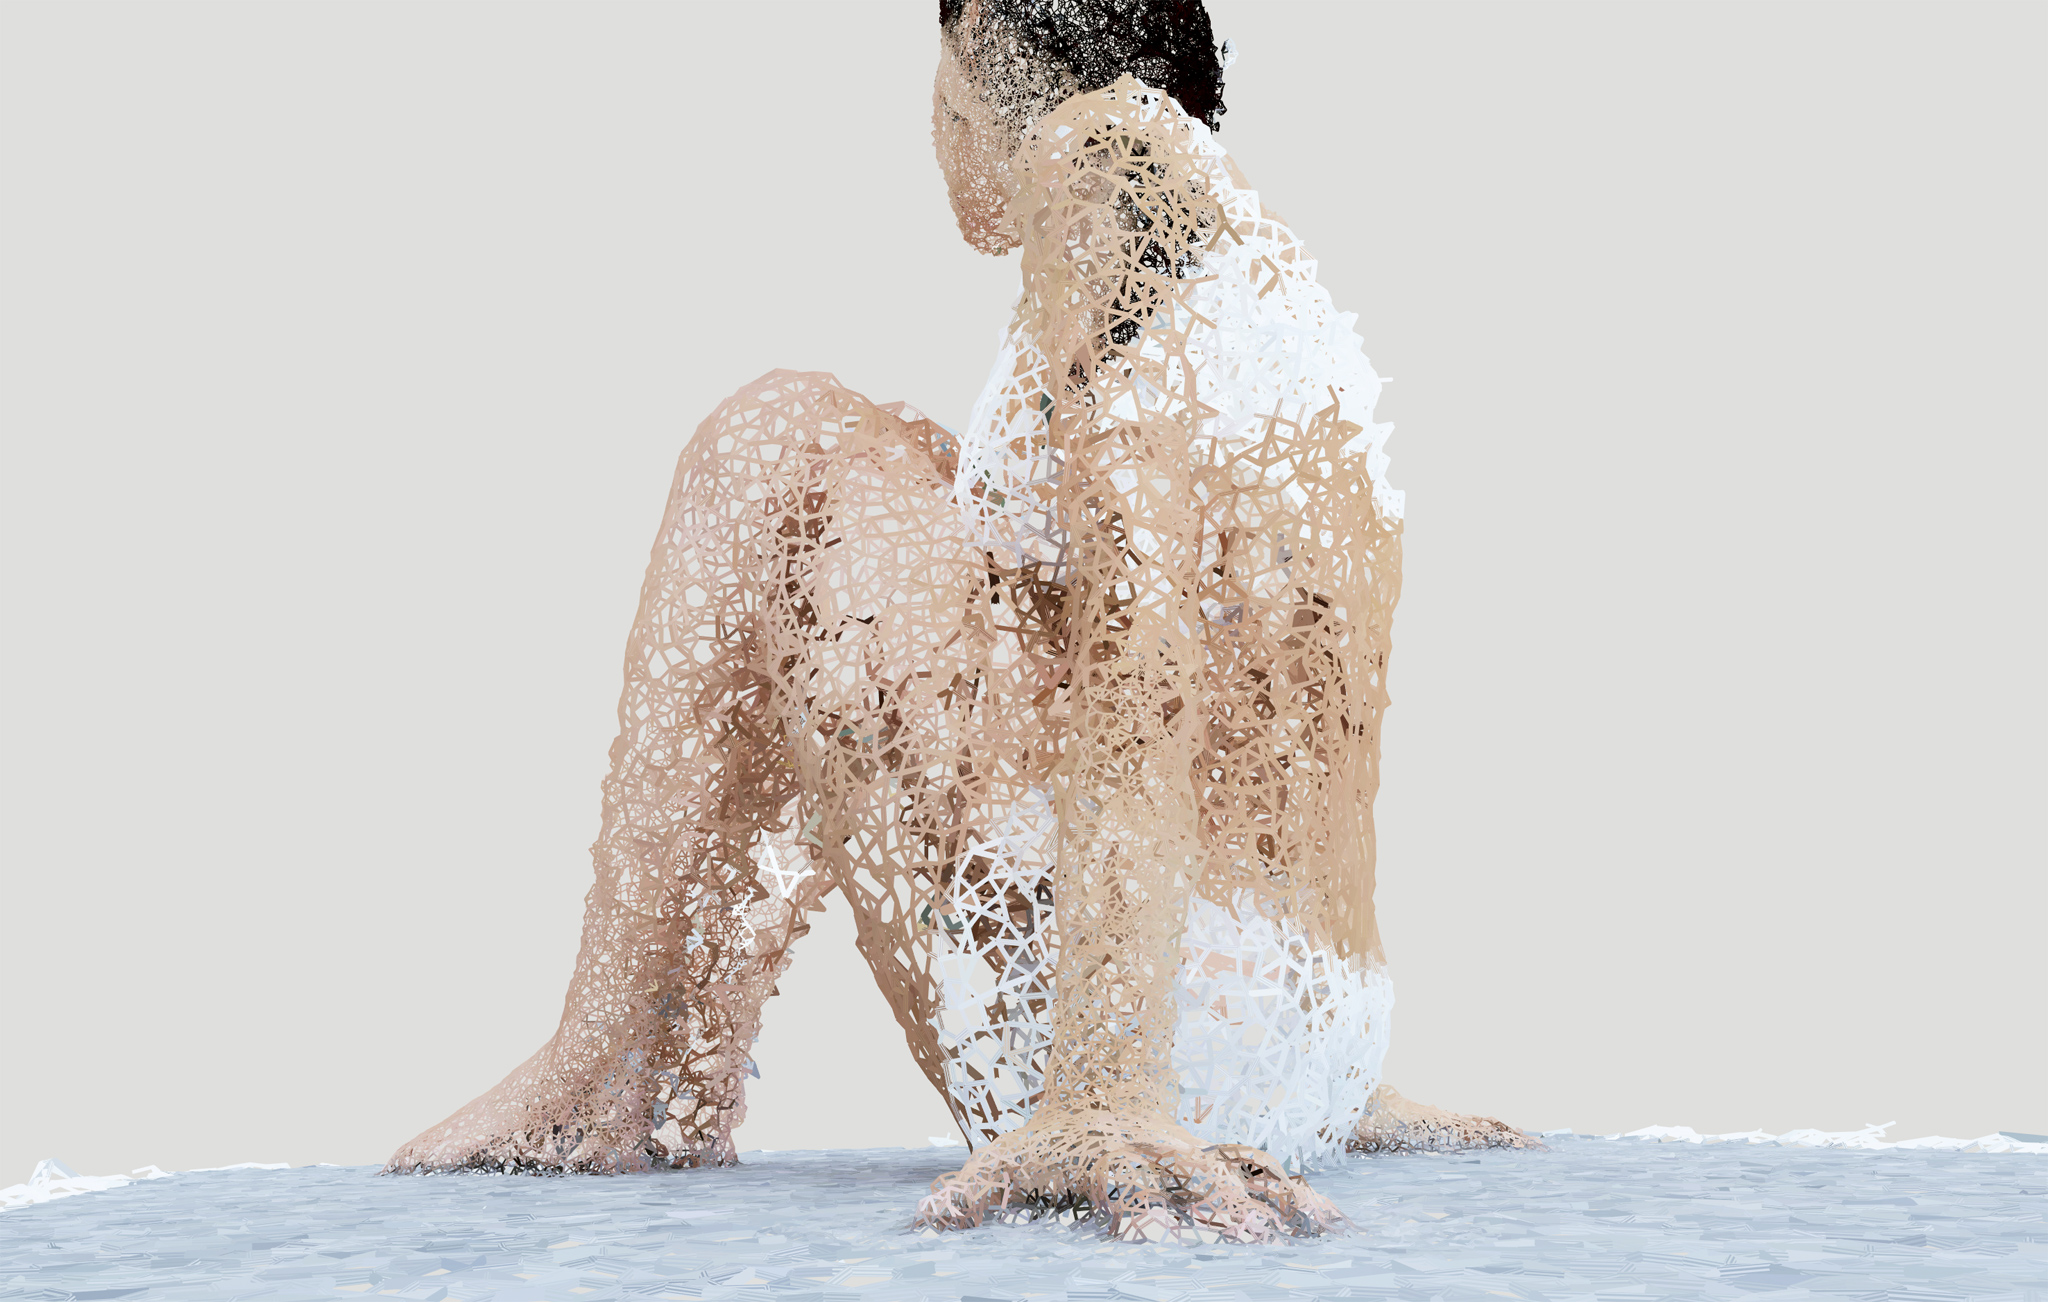
Fig. 9. Network.
I stumbled upon the style of Fig. 9 while testing the random walk algorithm. Each point is connected to its five nearest neighbors with a thin rod.
Other considerations
Painting is not about reproducing reality as faithfully as possible, we would rather convey the emotions inspired by the scene than a mere mechanical reproduction of it. This is why it is not crucial to use the largest and densest point cloud possible but instead the minimal one still producing the desired level of details.
An extension of this idea would be to create a reduced color palette for the scene and select the local color to match the closest color. Ideally the allowed color palette should be provided by the art director to drive the result.
Oculus Quill data format
Quill’s data format is relatively simple, all the magic actually happens in Quill’s renderer, created by Inigo Quilez for Oculus Story Studio.
I reverse engineered the format using HEXEdit and Quill itself to create sample files.
Note: the core QBIN format was largely unaffected by the February 2018 update that introduced animations. Each animation frame has its own pointer into the QBIN file where previously the entire paint layer had a single pointer into the file. The Quill.json on the other hand was significantly updated.
Overview
A Quill scene is composed of three files:
- Quill.json: contains the layer hierarchy and global information about the scene.
- State.json: contains the current rendering options, tool and color palette.
- Quill.qbin: contains strokes data.
JSON manifest
The file Quill.json is the manifest for the scene. It contains global scene information like the background color, whether animations should play on start, the home transform and the entire hierarchy of layers. The format is rather simple and variable names self-explanatory.
The layers can be of the following types:
- Group layers: contain a list of other layers. The root layer is a group layer.
- Sound and picture layers: contain various info about an external media source and its filename.
- Paint layers: contain a list of animation frames (called “Drawings”) and each frame will reference an address in the QBIN file.
In addition to the information specific to their type, all layers share a number of attributes: a name, a transform relative to the parent group layer, whether it is visible, locked, collapsed, information regarding animation looping as well as some other bits of information.
Note: it should be possible to craft a file in such a way that several layers point to the same QBIN data block. This could be useful for “instancing” a drawing multiple times in the scene without increasing the file size.
QBIN binary format
The QBIN data file contains a small header followed by several lists of strokes. The lists of strokes are stored one after the other and the paint layers reference the file address for the start of the corresponding list.
In the original file format the list of strokes corresponded to paint layers, now they correspond to animation frames inside paint layers. Each animation frame is called a “Drawing”. Each layer has its own independent timeline of drawings.
The following table summarize the fields, their hex offsets and data types that I could figure out. Some fields type or meaning are still unknown to me. This table should be valid for version 1.4 of Quill.
File
| Offset | Size | Type | Description |
|---|---|---|---|
| 0x00 | 4 | int32 | Highest global stroke id |
| 0x04 | 4 | ? | Unknown |
| 0x08 | - | Array<Drawing> | Start of array of drawings |
Drawing
| Offset | Size | Type | Description |
|---|---|---|---|
| 0x00 | 4 | int32 | Number of strokes in the drawing |
| 0x04 | - | Array<Stroke> | Start of array of strokes |
Stroke
| Offset | Size | Type | Description |
|---|---|---|---|
| 0x00 | 4 | int32 | Global stroke id |
| 0x04 | 4 | ? | Unknown |
| 0x08 | 24 | Bbox | Bounding box of the stroke |
| 0x24 | 2 | int16 | Brush type |
| 0x26 | 1 | bool | Disable rotational opacity |
| 0x27 | 1 | ? | Unknown |
| 0x28 | 4 | int32 | Number of vertices in the stroke |
| 0x2C | - | Array<Vertex> | Start of array of vertices |
Brush type enumeration: 0: Line, 1: Ribbon, 2: Cylinder, 3: Ellipse, 4: Cube.
Bbox
| Offset | Size | Type | Description |
|---|---|---|---|
| 0x00 | 4 | float | min x |
| 0x04 | 4 | float | max x |
| 0x08 | 4 | float | min y |
| 0x0C | 4 | float | max y |
| 0x10 | 4 | float | min z |
| 0x14 | 4 | float | max z |
Vertex
| Offset | Size | Type | Description |
|---|---|---|---|
| 0x00 | 12 | vec3 | Position |
| 0x0C | 12 | vec3 | Normal |
| 0x18 | 12 | vec3 | Tangent |
| 0x24 | 12 | vec3 | Color |
| 0x30 | 4 | float | Opacity |
| 0x34 | 4 | float | Width |
Limitations and future directions
I have not yet experimented with generating animations. It should be possible to animate strokes positions in interesting ways by hooking a particle engine to the frame generator.
As mentioned, an interesting development would be to restrict the allowed color palette for artistic purposes.
Another improvement for some scenes would be to reproduce large flat planes as such using the Ribbon brush instead of creating a myriad of strokes based on the texture of the original surface.
A more advanced idea could be to use machine learning to perform style transfer: extract point clouds from existing Quill artworks created manually by artists, learn a model linking original strokes to extracted points, and then apply that model to transform new point clouds back into a painting using the artist’s style.
Let me know in the comments if you have other ideas for new art styles or extensions.
References
- Oculus Quill: https://www.oculus.com/experiences/rift/oculus-quill/
- Agisoft Photoscan: http://www.agisoft.com/
- Cloud Compare: http://www.cloudcompare.org/
- PCL - Point Cloud Library: http://pointclouds.org/
- Pointillism: https://en.wikipedia.org/wiki/Pointillism
- MiTeC HEXEdit: http://www.mitec.cz/hex.html
- Artistic style transfer with Convolutional Neural Network: https://medium.com/data-science-group-iitr/artistic-style-transfer-with-convolutional-neural-network-7ce2476039fd